

Scanning Your Project
Getting Started
Once you’ve configured SBOM Workbench, you’re ready to scan your first project. On the right-hand side, you’ll find the option to scan a New Project. You can either click it directly or use the dropdown arrow to choose from the following options: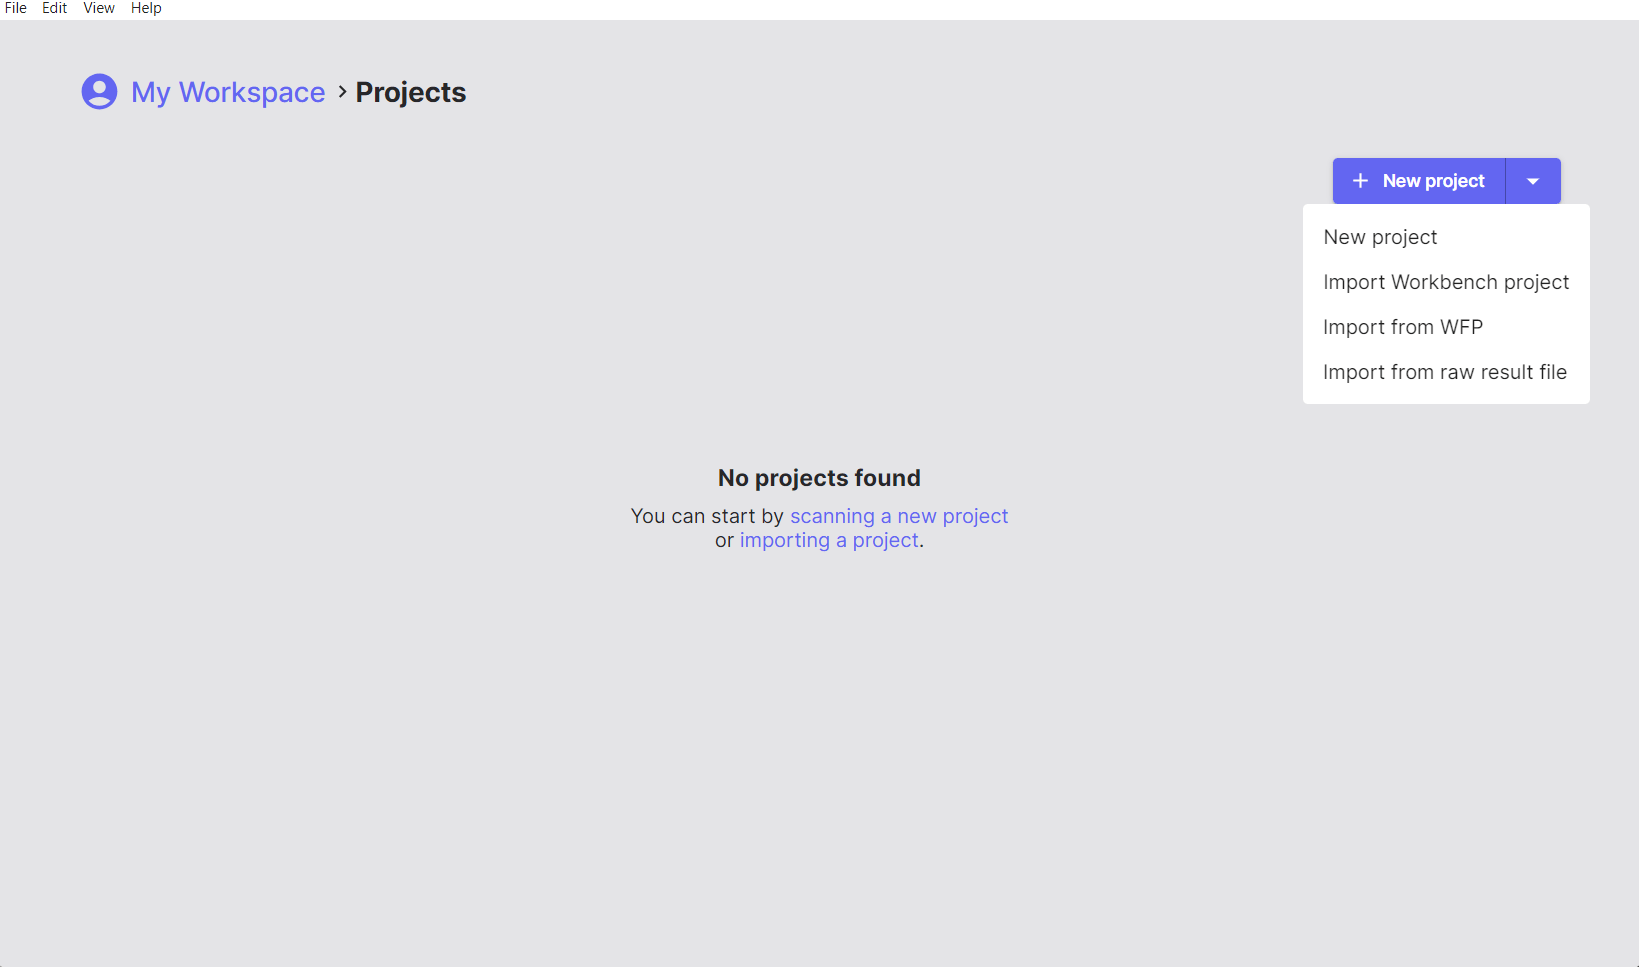
Project Options
- New Project: Select the directory of the project you want to scan.
- Import Workbench Project: Load a previously scanned project saved as a
.zipfile. - Import from WFP: Import a Winnowing FingerPrint
.wfpfile. - Import from raw result file: Load the output from a previous scan saved as a
.jsonfile.
Scanning Your First Project
- Click New Project and select the root folder of your source code project.
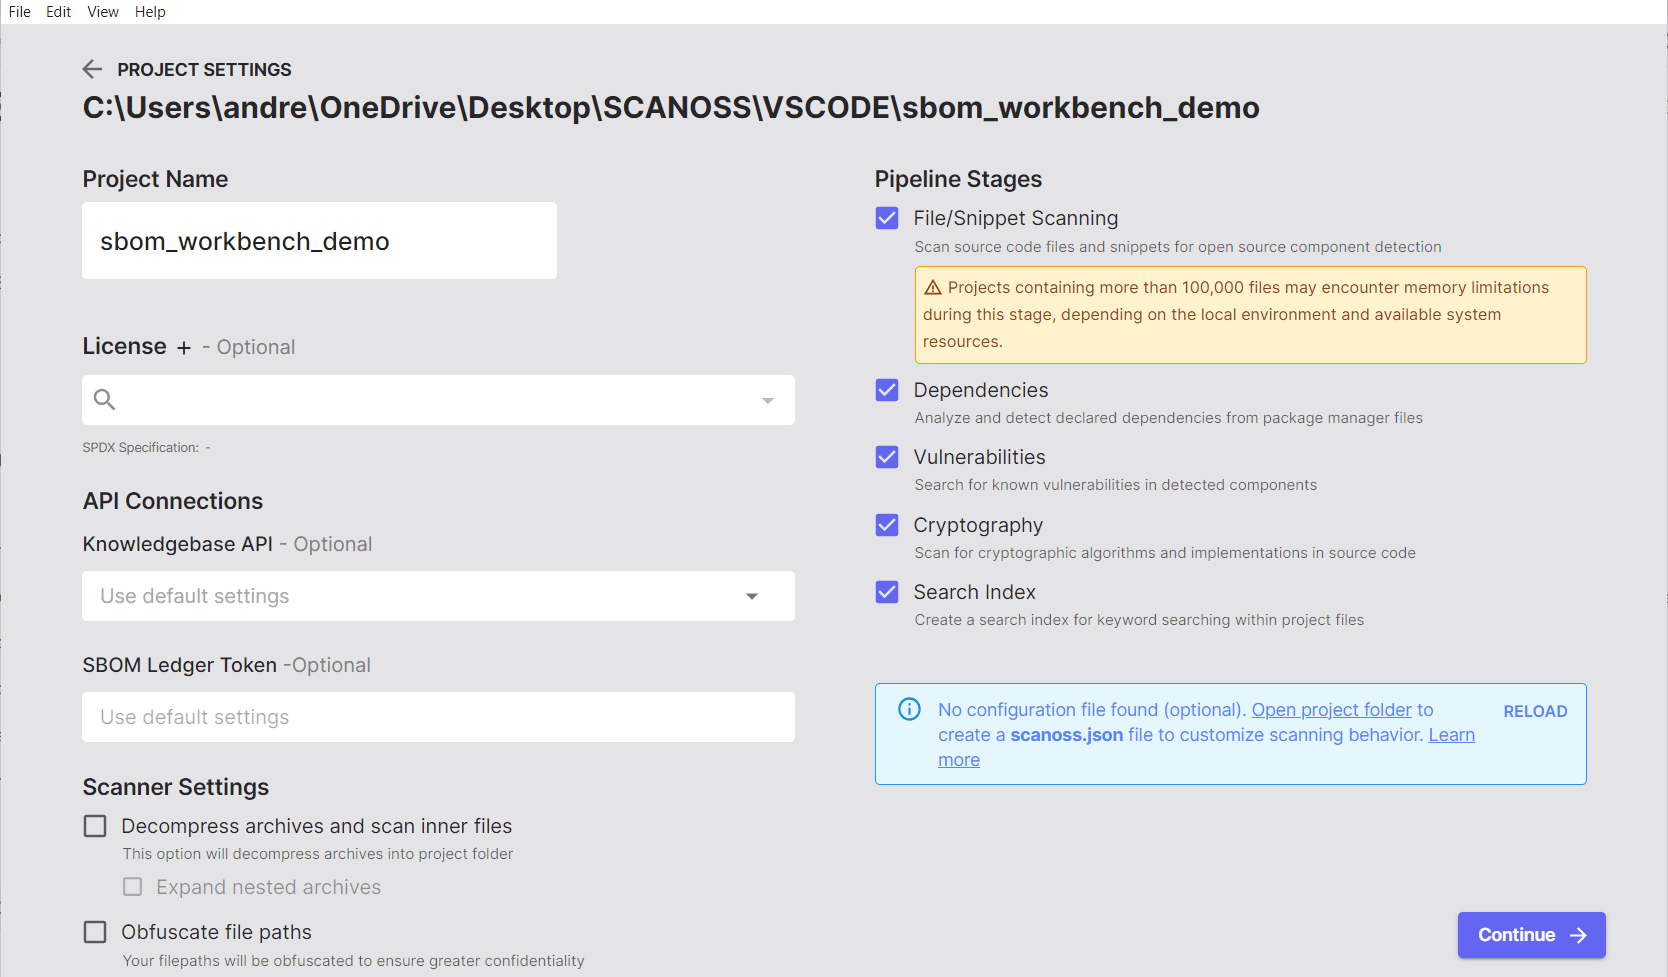
- After selecting your project, adjust the scan configuration as needed. None of these are required for a first scan, the defaults work fine, but here’s what each one does:
- Project name: A descriptive, meaningful name for the project.
- Default license: The default license for your project, if applicable.
- SCANOSS API: Your API key and endpoint (see Initial Configuration).
- SBOM Ledger: Enables integration with SBOM Ledger, a separate SCANOSS product for advanced SBOM tracking, if your organisation uses it.
- Decompress Archives: When enabled, compressed archives are decompressed and their contents scanned individually.
- Unpack Nested Archives: Scans archives contained within other archives, descending up to 3 levels deep by default (configurable).
- Obfuscate File Paths: When enabled, file paths are hashed before being sent to the SCANOSS API.
- Enable HPSM (High Precision Snippet Matching): A more granular fingerprinting algorithm for increased match accuracy, at the cost of additional scan time.
- Include All File Types: When enabled, bypasses the default file extension filter so that configuration files, documentation, and other non-source files are also scanned.
Understanding the Scanning Process
When you select your project folder, SBOM Workbench automatically analyses your files through a few steps. It first filters out unnecessary items like build folders, binaries, empty files and common metadata, keeping only the files that matter. Enable Include All File Types in the scan settings to bypass this filter and scan every file regardless of extension.Fingerprinting
Next, it creates unique digital “fingerprints” of your source code using a proven technique called Winnowing. These fingerprints are securely compared against the SCANOSS database, which contains data from millions of open-source projects. This allows SBOM Workbench to recognise even small pieces of reused code.Analysis
In parallel, the tool checks for cryptography use, parses dependency manifest files and identifies any known vulnerabilities.Results
When the scan is complete, SBOM Workbench generates a detailed report that shows matched components, licenses, vulnerabilities, and dependencies. Everything is stored locally in your workspace and can be exported in multiple formats, including SPDX, CycloneDX, CSV, or HTML.Archive Format Support
SBOM Workbench supports scanning compressed and archived files, automatically decompressing them during the scan process.Understanding Your Scan Results
The Reports Tab Overview
After scanning your project in SBOM Workbench, the Reports tab provides comprehensive analysis and insights into your scan results. The Reports section is divided into two main tabs: Detected and Identified, each offering different perspectives on your project’s composition.Detected Tab: Raw Scan Results
- What it shows: Raw, unmodified results from the SCANOSS API
- When to use: Initial review of scan results before any manual auditing
- Key characteristic: No user actions have been taken on these matches
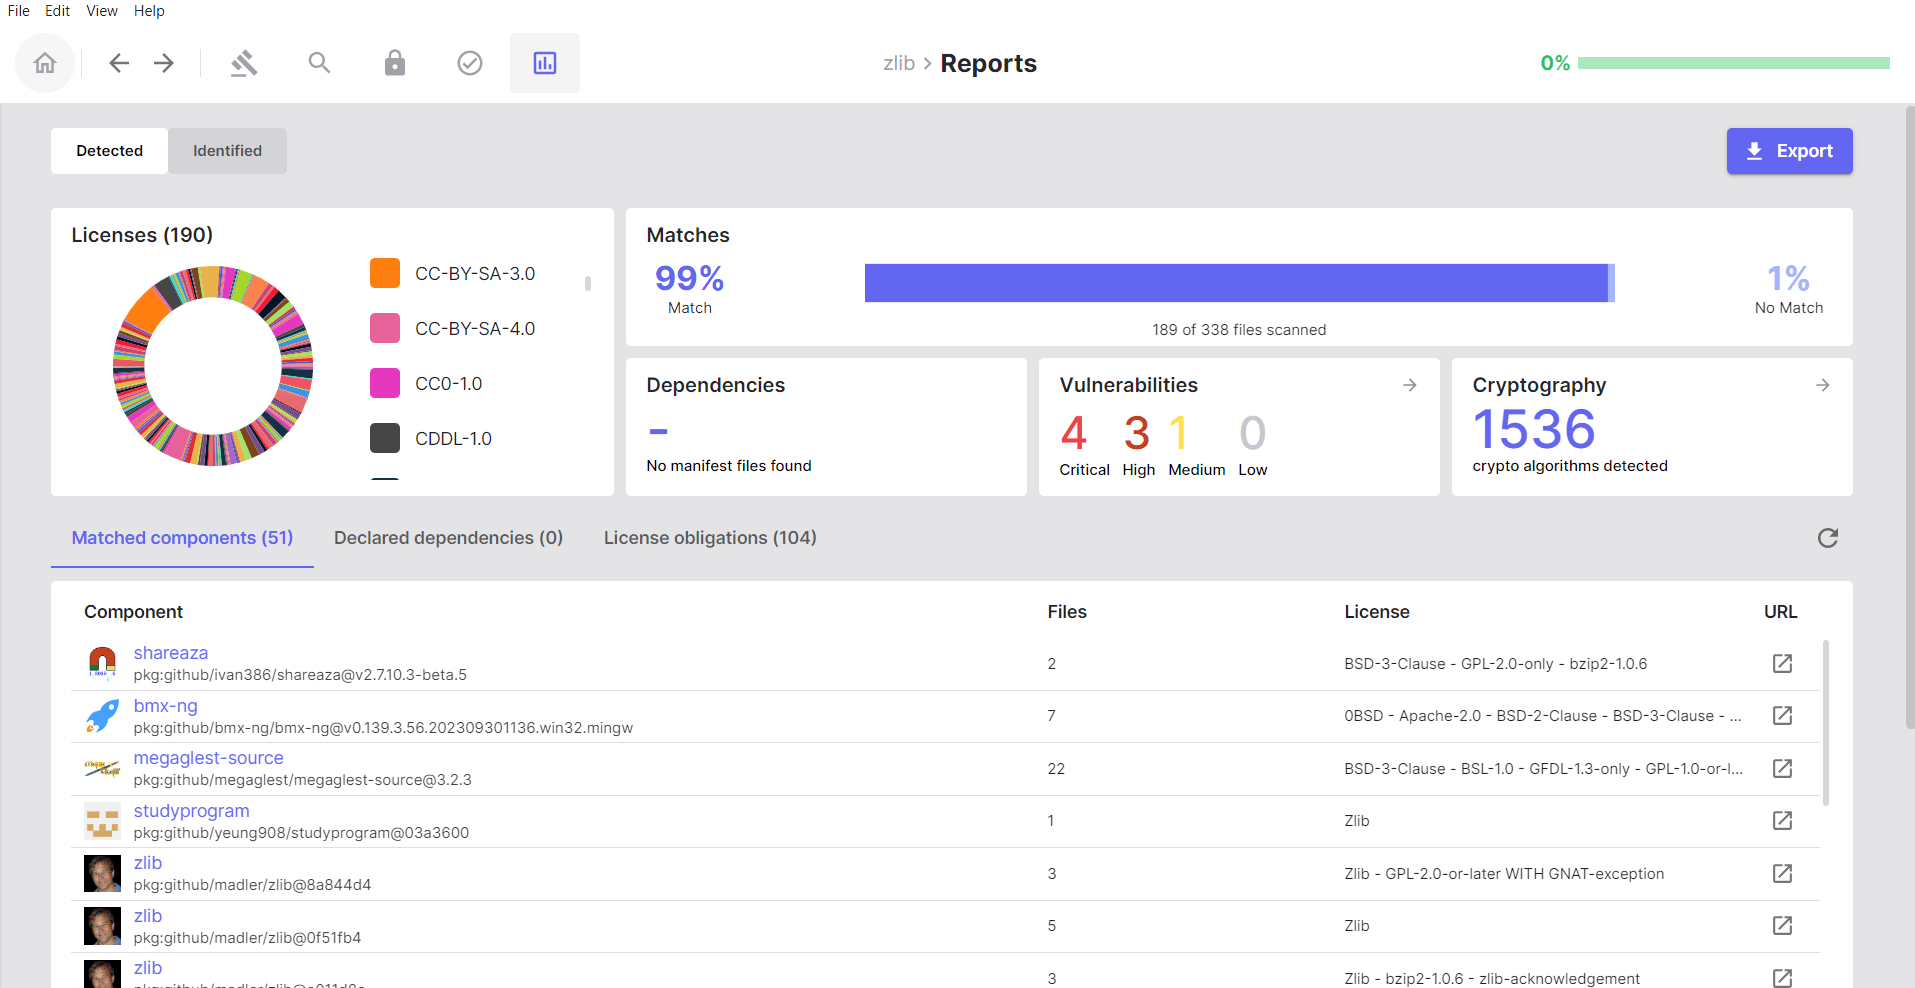
Summary Metrics
At the top of the Detected tab, you’ll see a summary bar with key metrics:- Matches: Number of your project files that matched components in the SCANOSS database
- Dependencies: Count of dependencies found in manifest files (
package.json,pom.xml, etc.) - Vulnerabilities: Total number of known security vulnerabilities detected across all matched components
- Cryptography: Cryptographic algorithms and patterns detected by analysing your source code
- Licenses: Summary of all licenses detected across your matched components
Matched Components
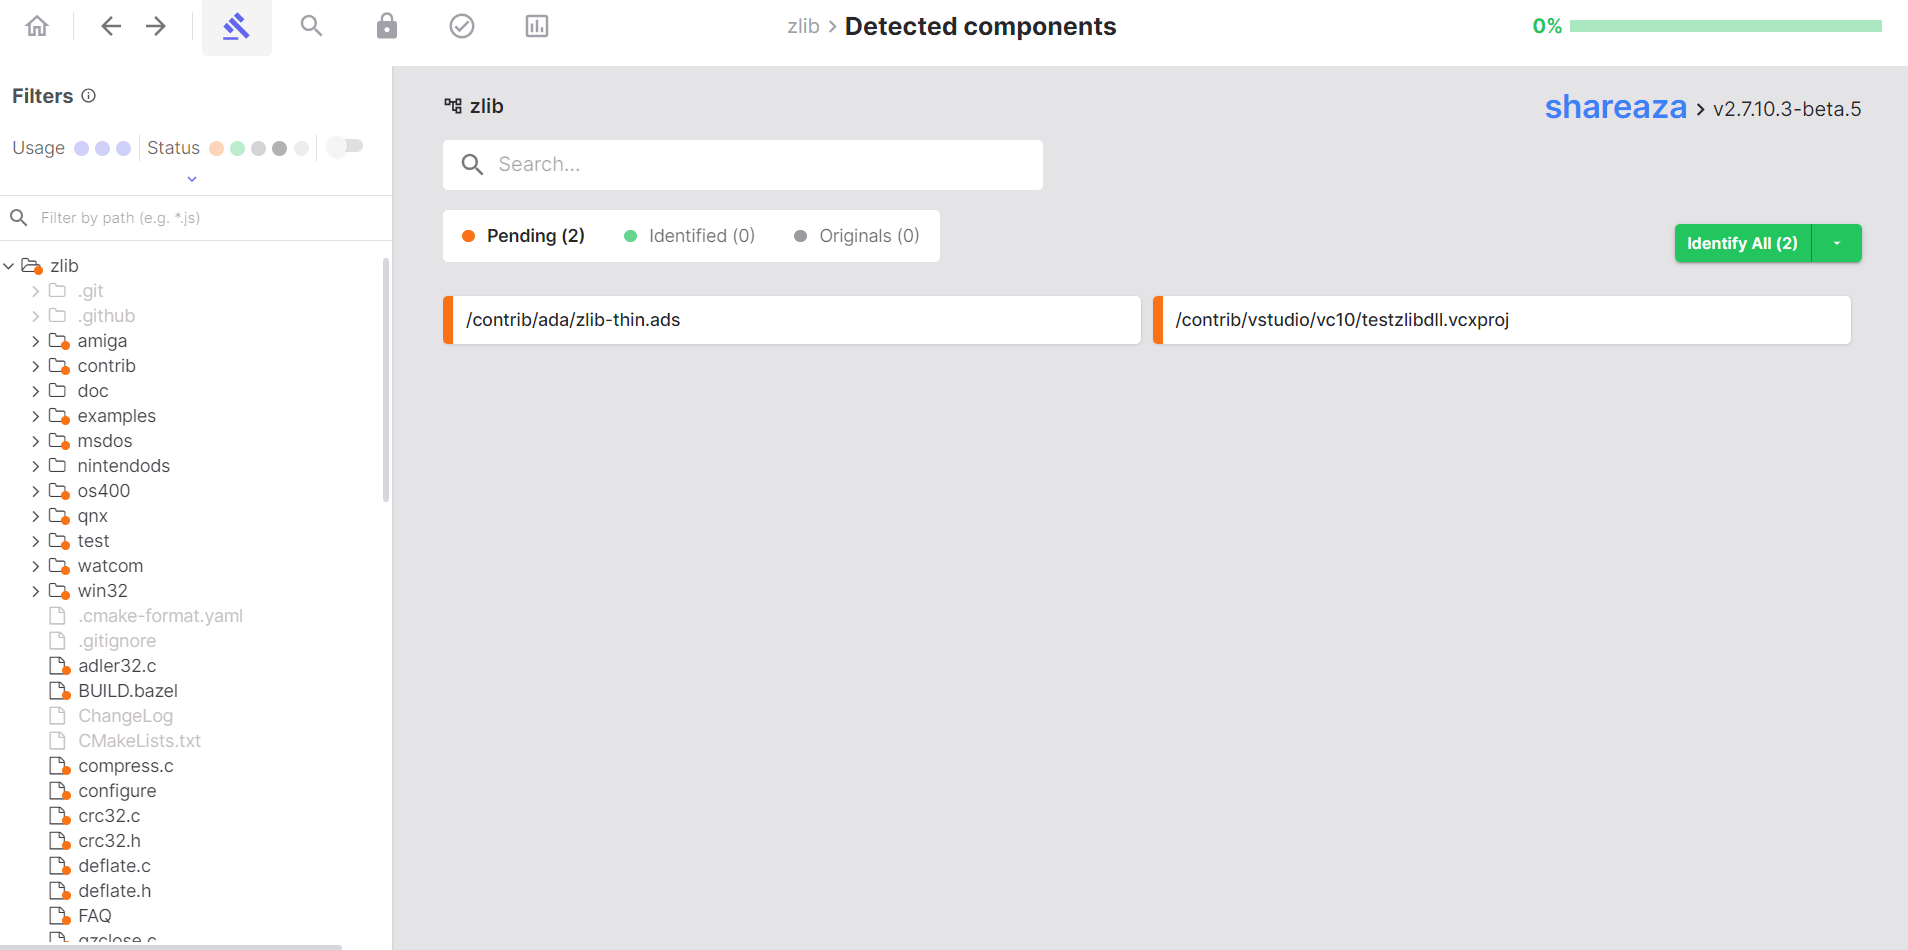
Open source components that the SCANOSS engine identified in your codebase.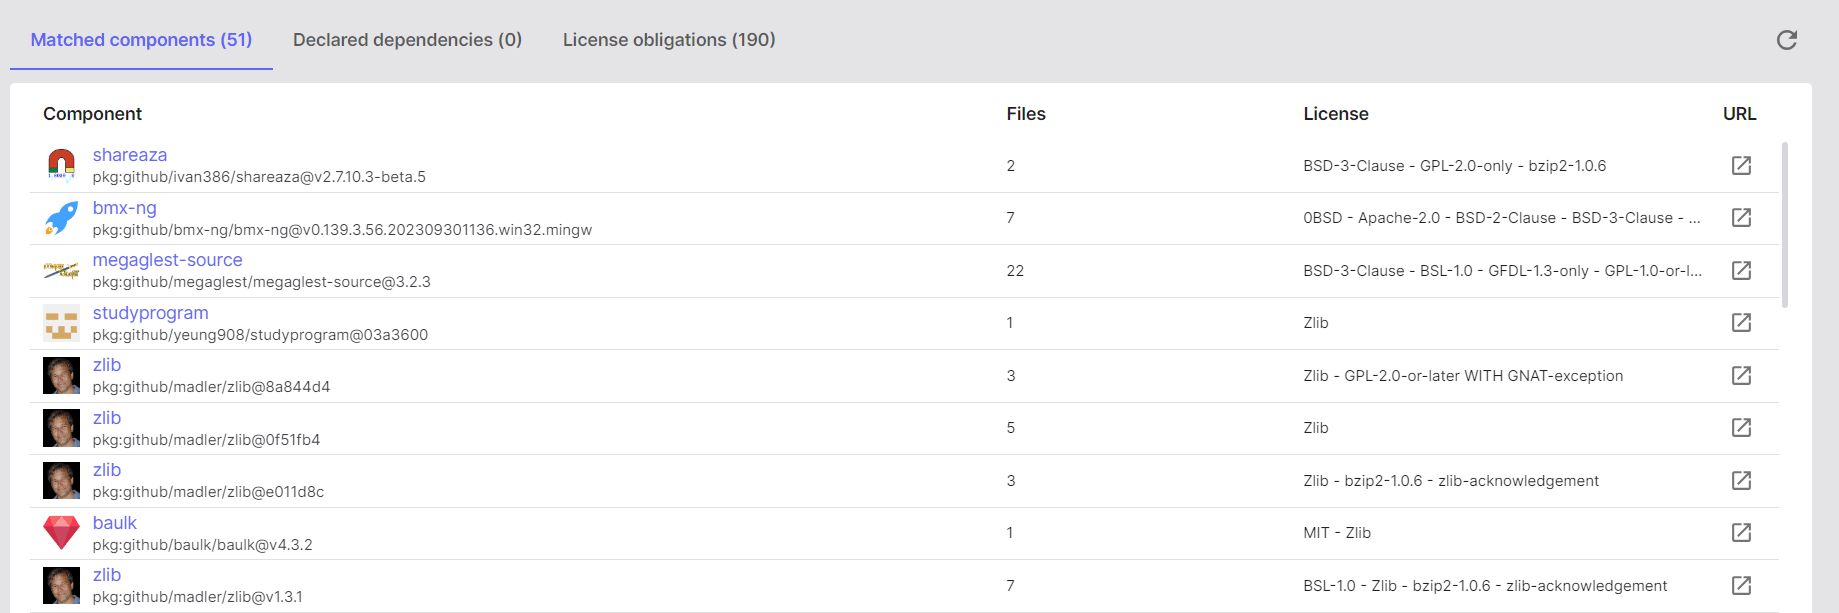
- Click on a component to see which files matched it
- Click on any of the files to review the match percentages in order to understand the extent of usage
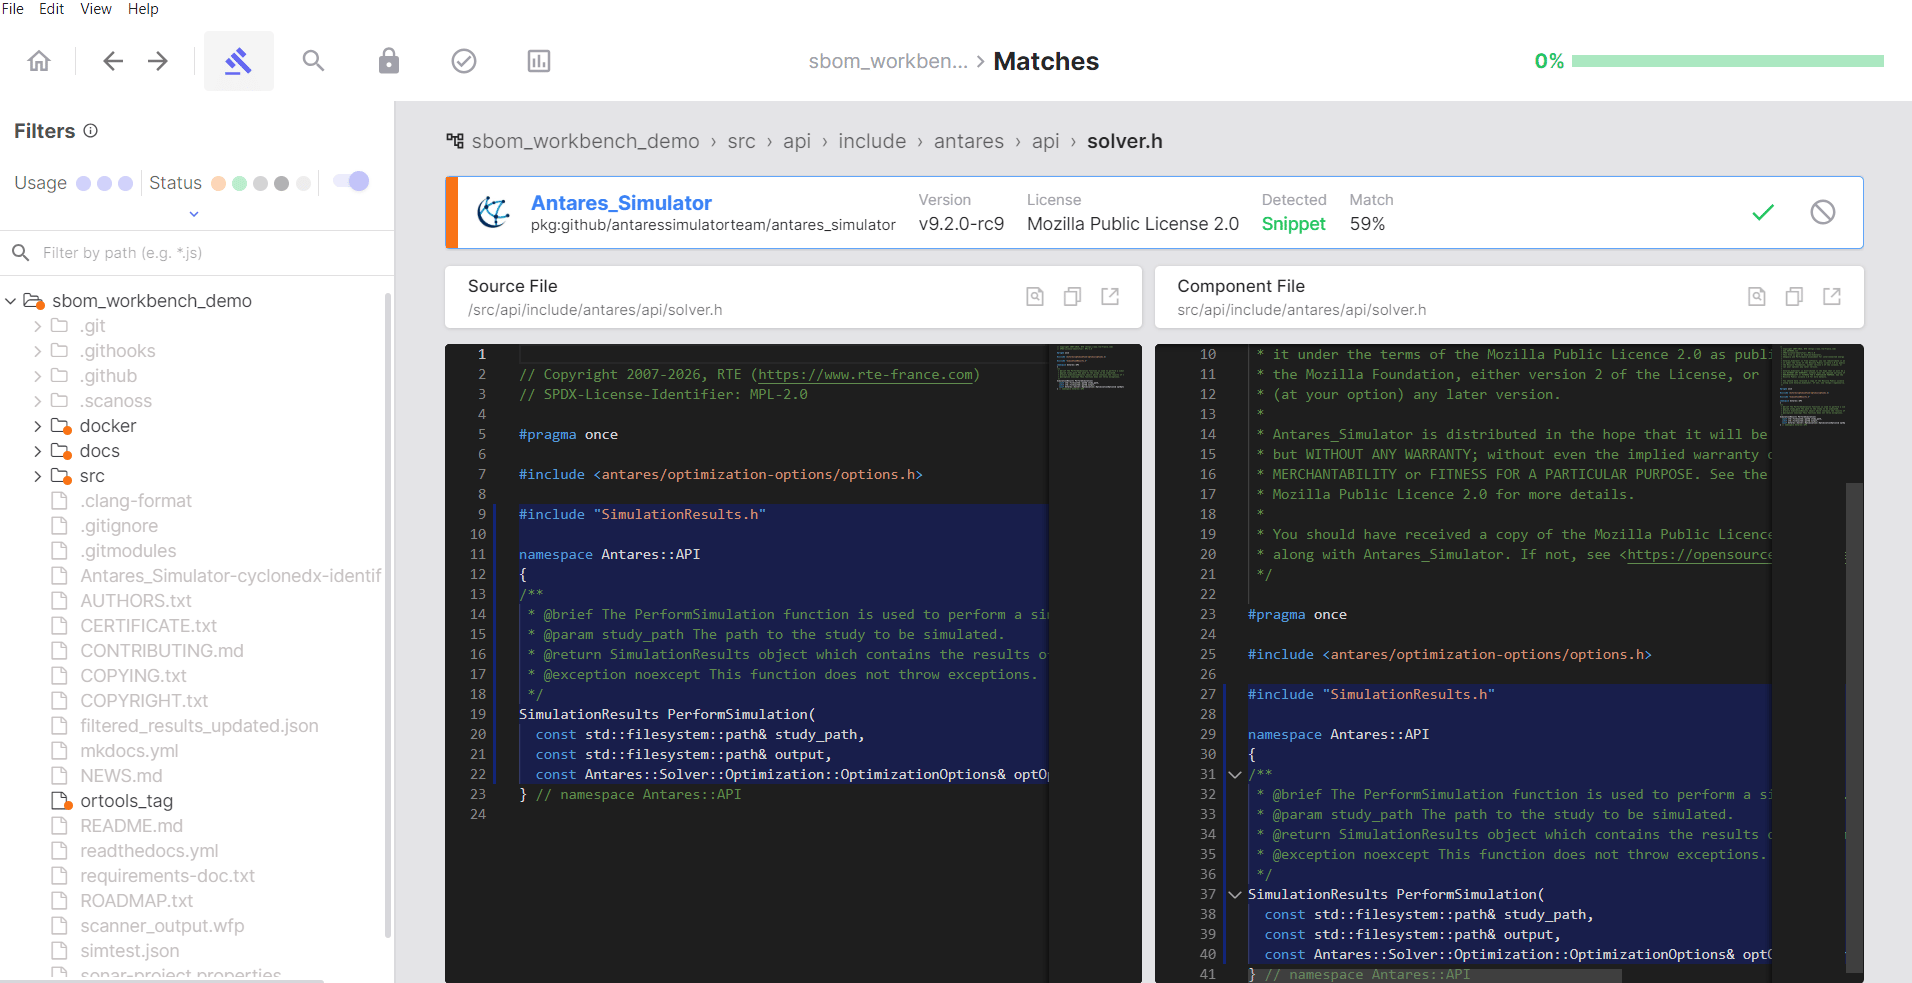
- Decide on the match, choose to Identify the component or Mark as Original if it’s your own code

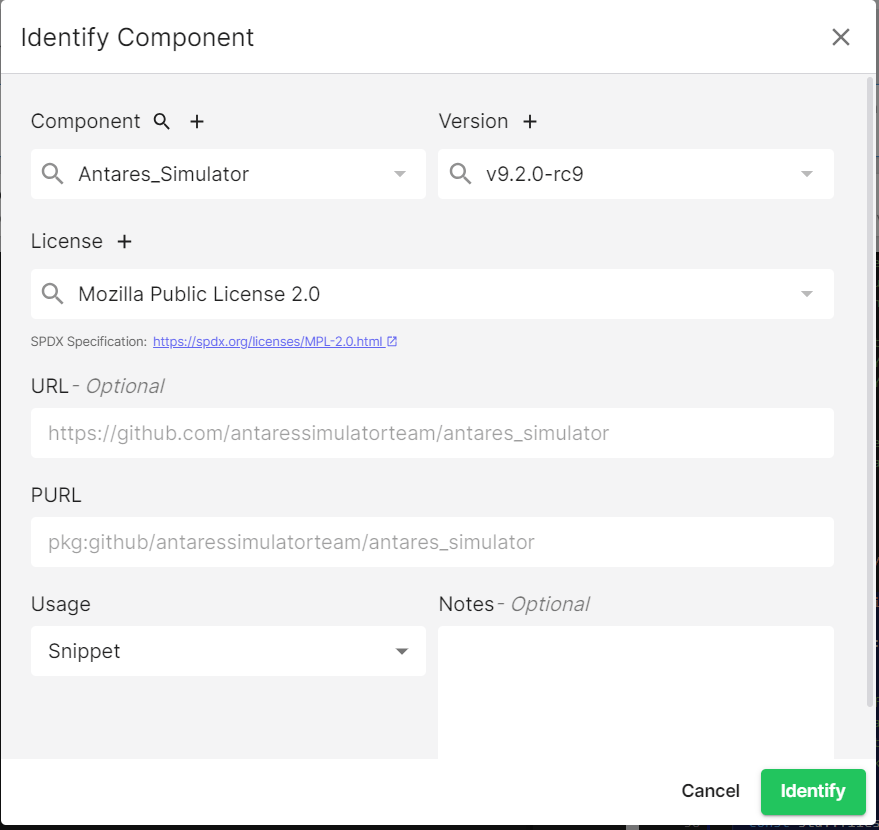
- If you click Identify, a dialog will appear prompting you to enter the component details
- After identifying or marking your first component as original, repeat the process for the remaining components
Declared Dependencies
All dependencies listed in your project’s manifest files.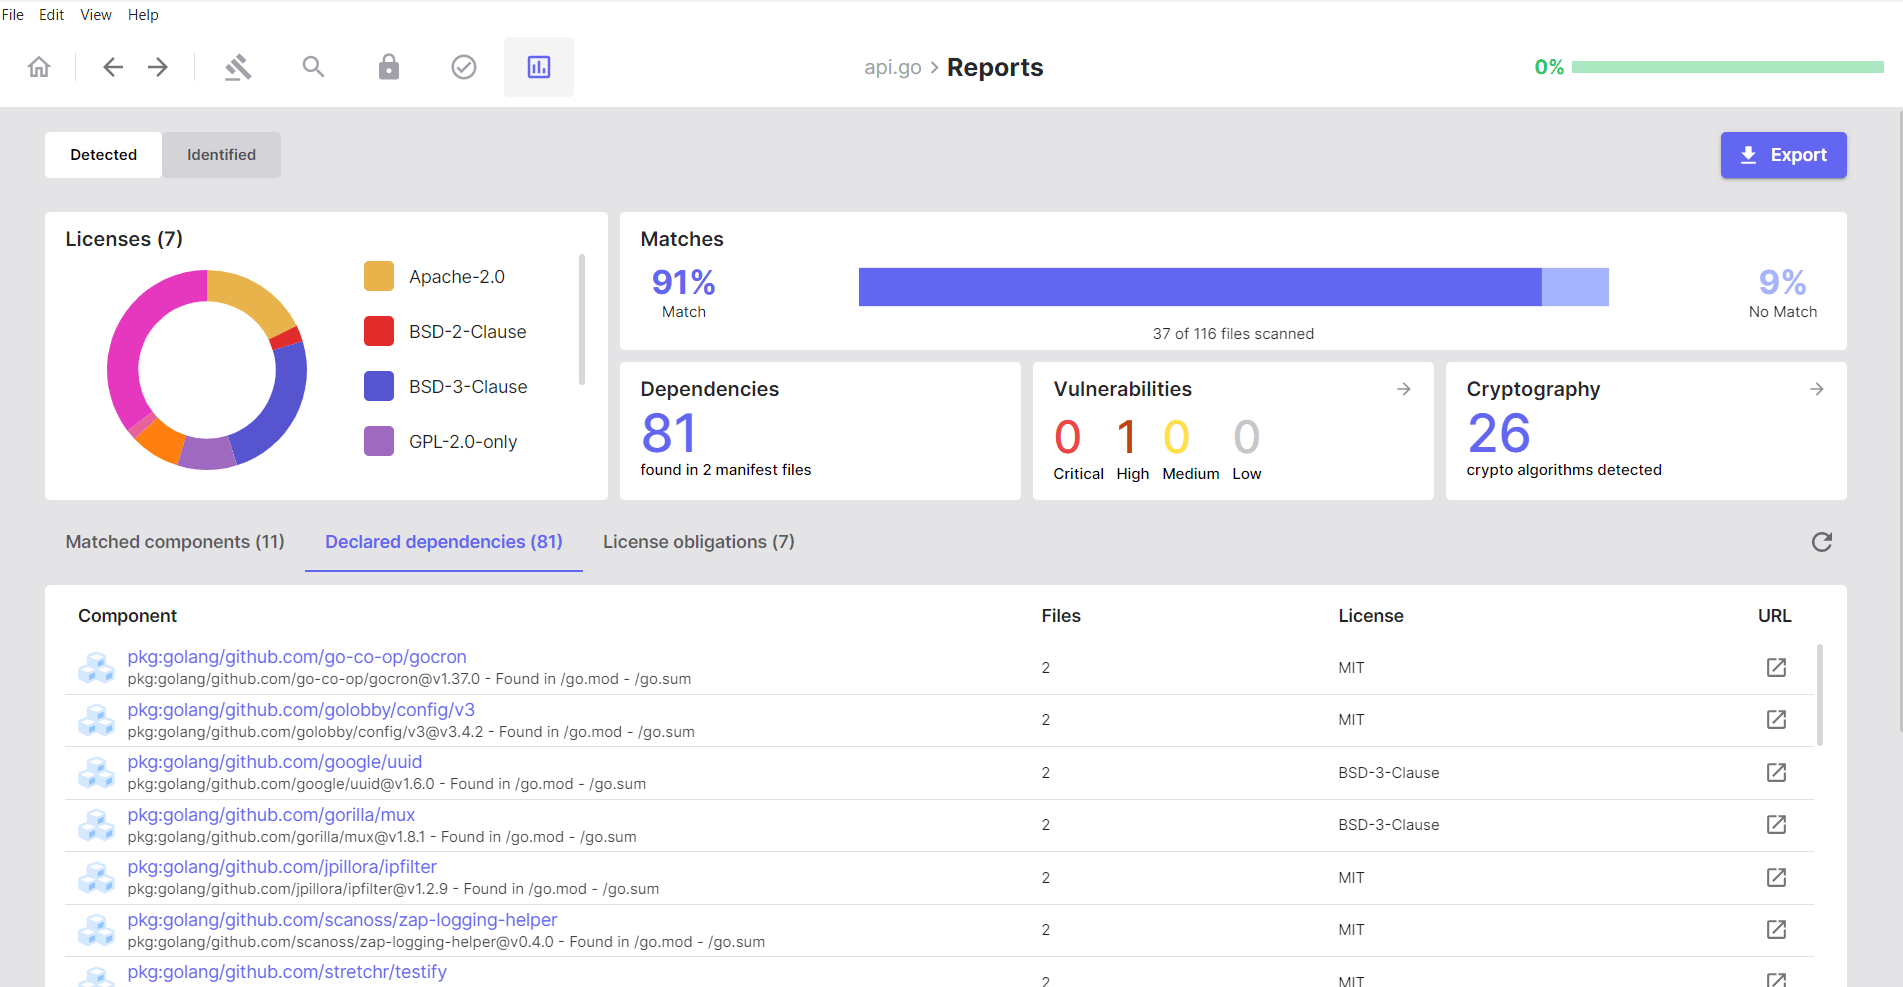
- Click a dependency to view its details and any related matches
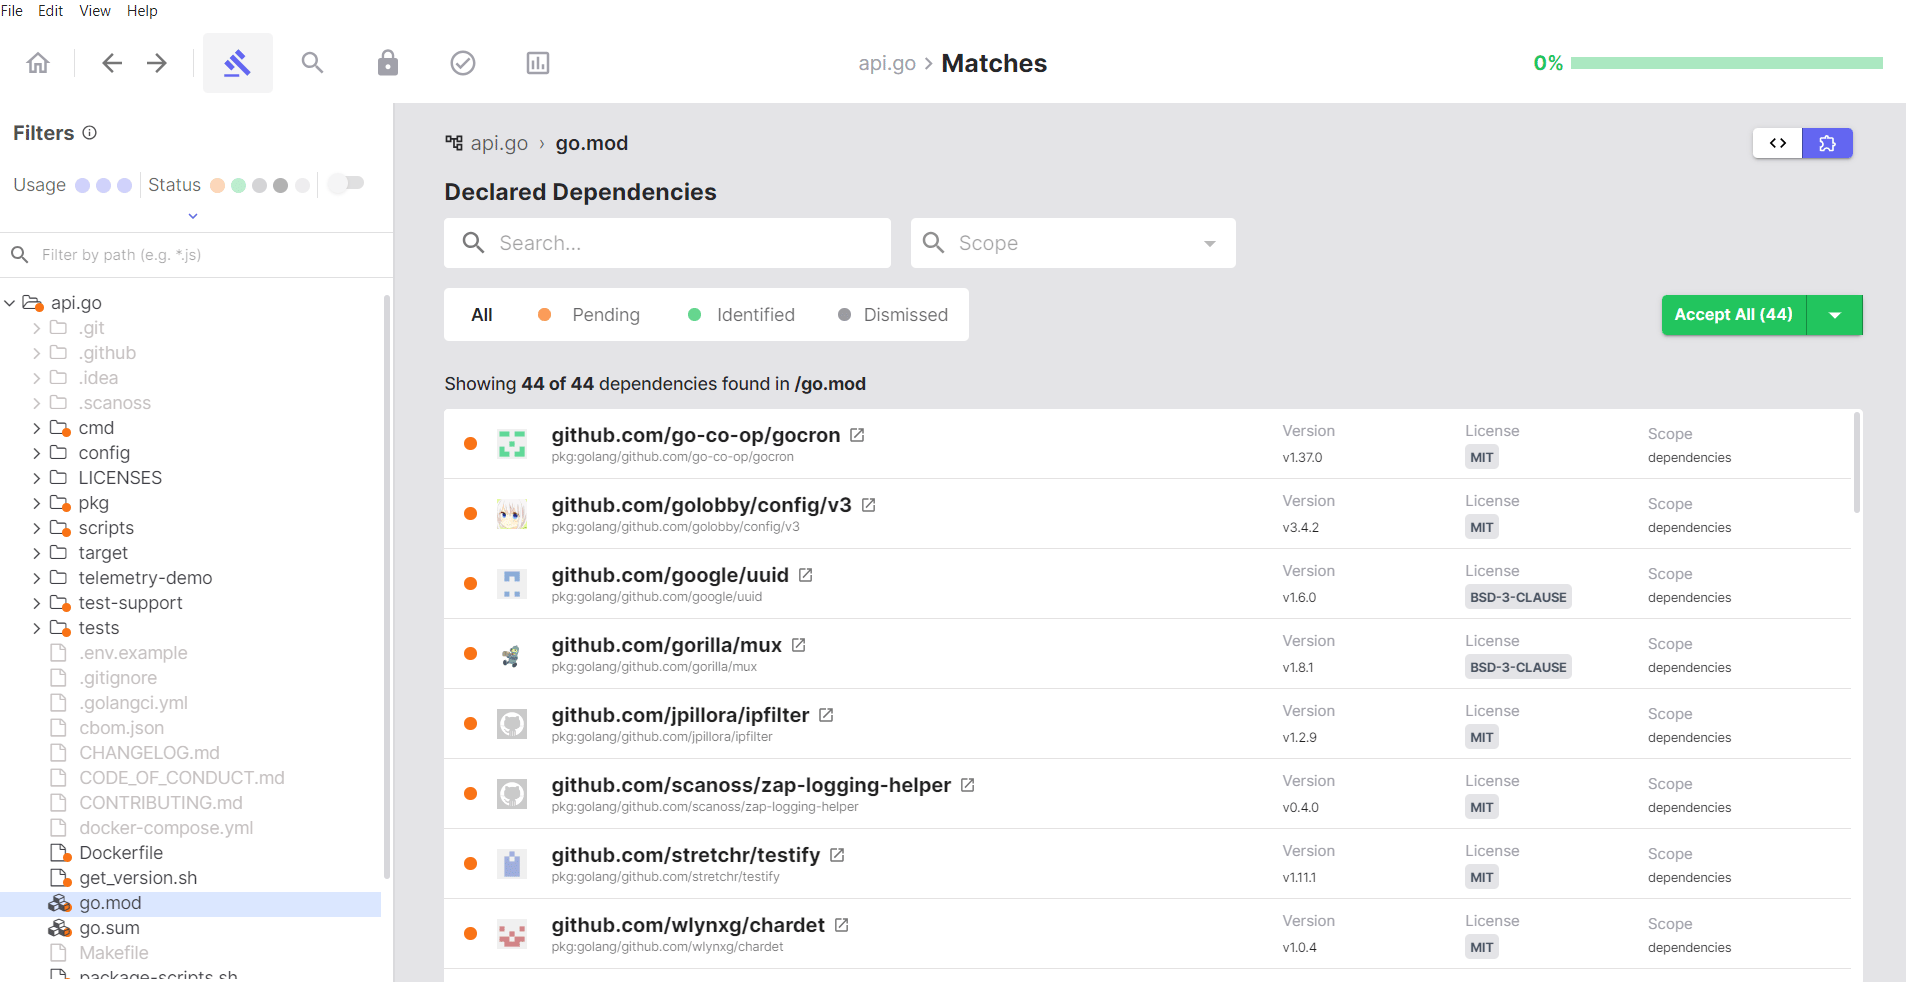
- Open a dependency to see the associated package information
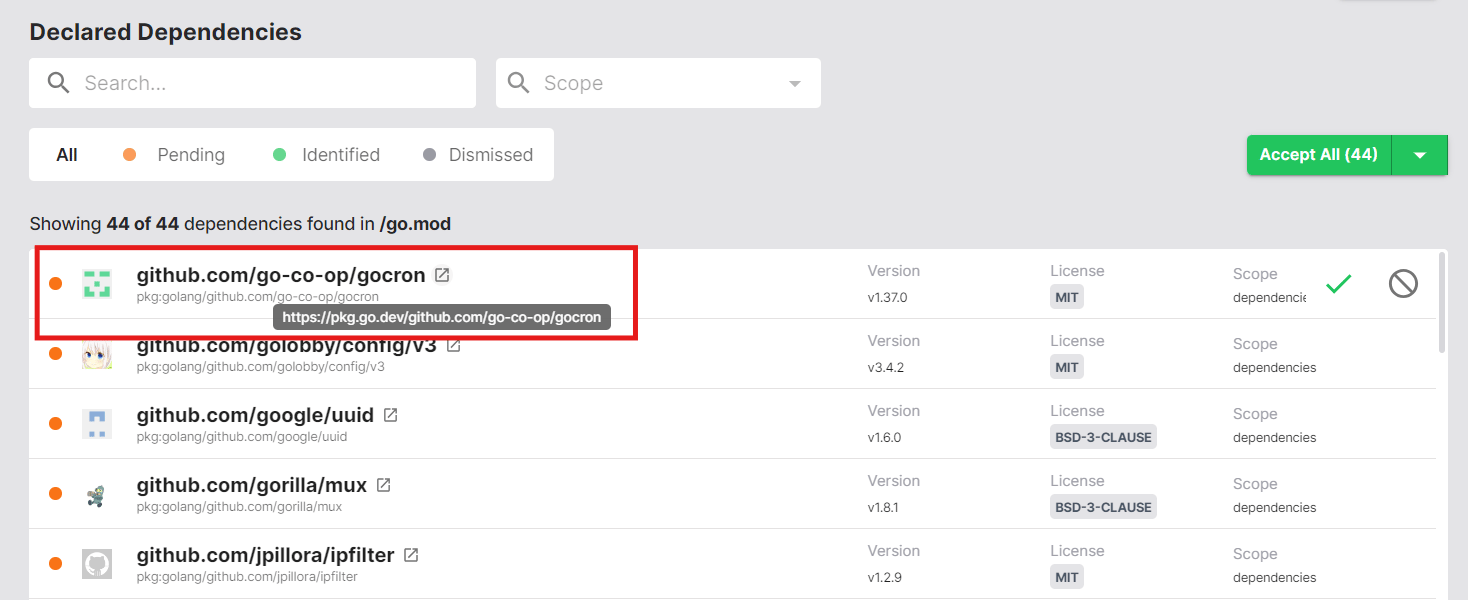
- Make a decision on each dependency by hovering over it on the right-hand side and choosing Accept or Dismiss

Vulnerabilities
The Vulnerabilities section provides a security-focused view of known vulnerabilities (CVEs) detected in your matched components and dependencies. This section helps you identify and prioritise security risks in your software supply chain. Vulnerabilities are categorised by severity:- Critical
- High
- Medium
- Low
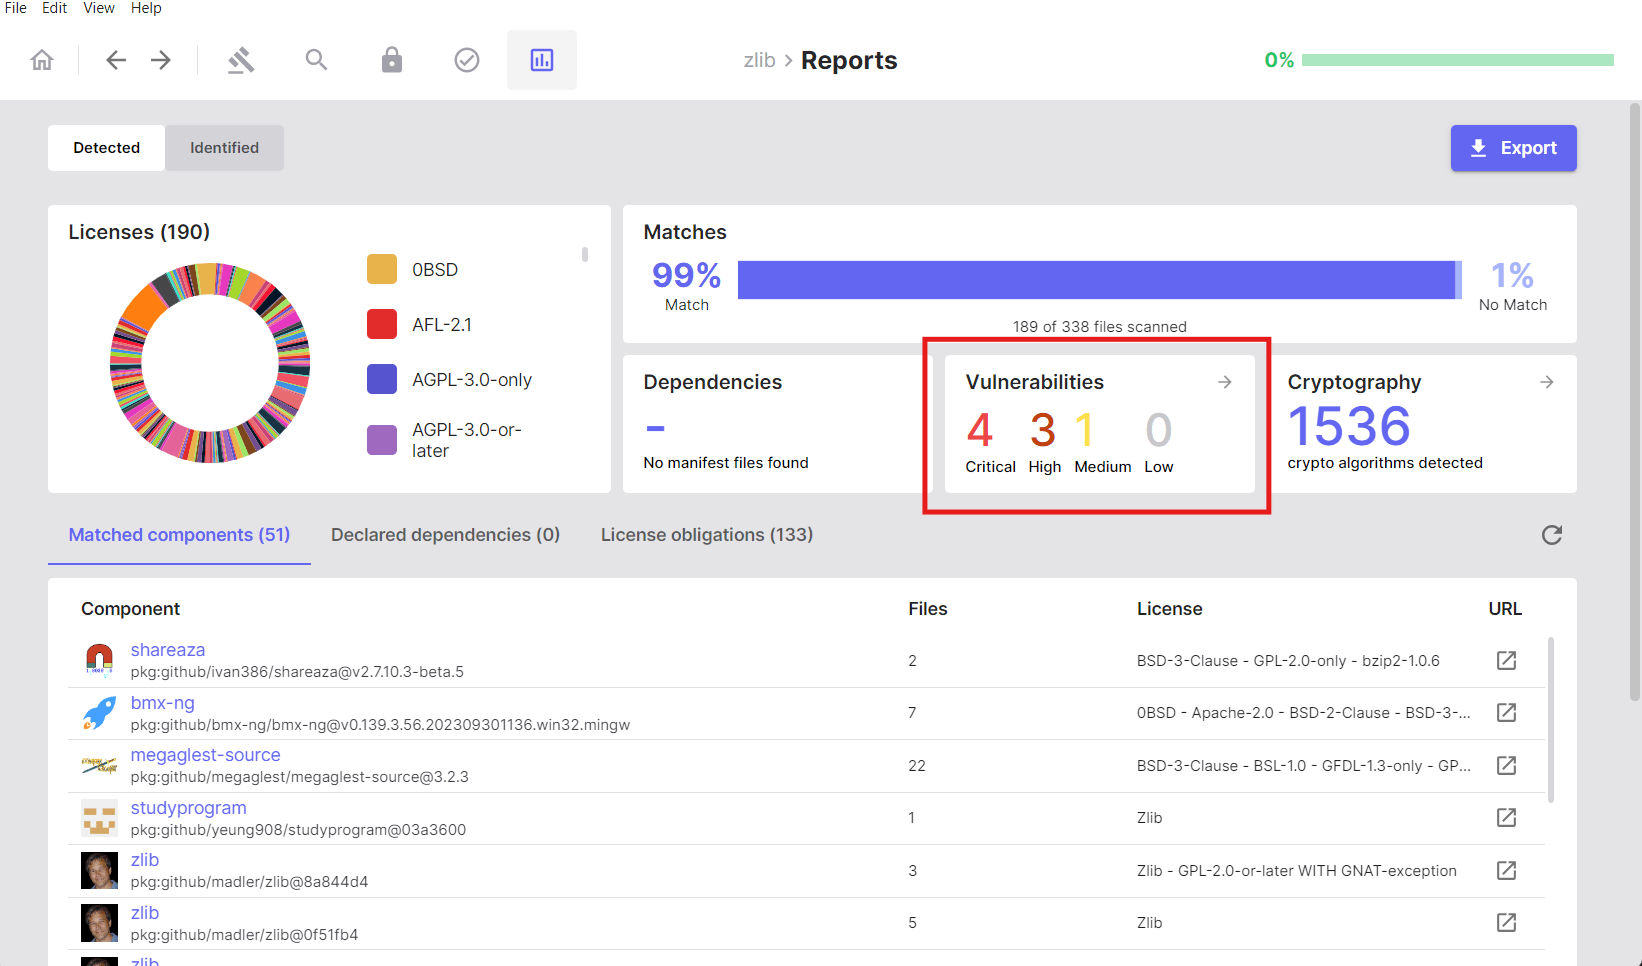
Viewing Vulnerability Details
Clicking into the Vulnerabilities tab reveals a comprehensive table with detailed information for each detected vulnerability: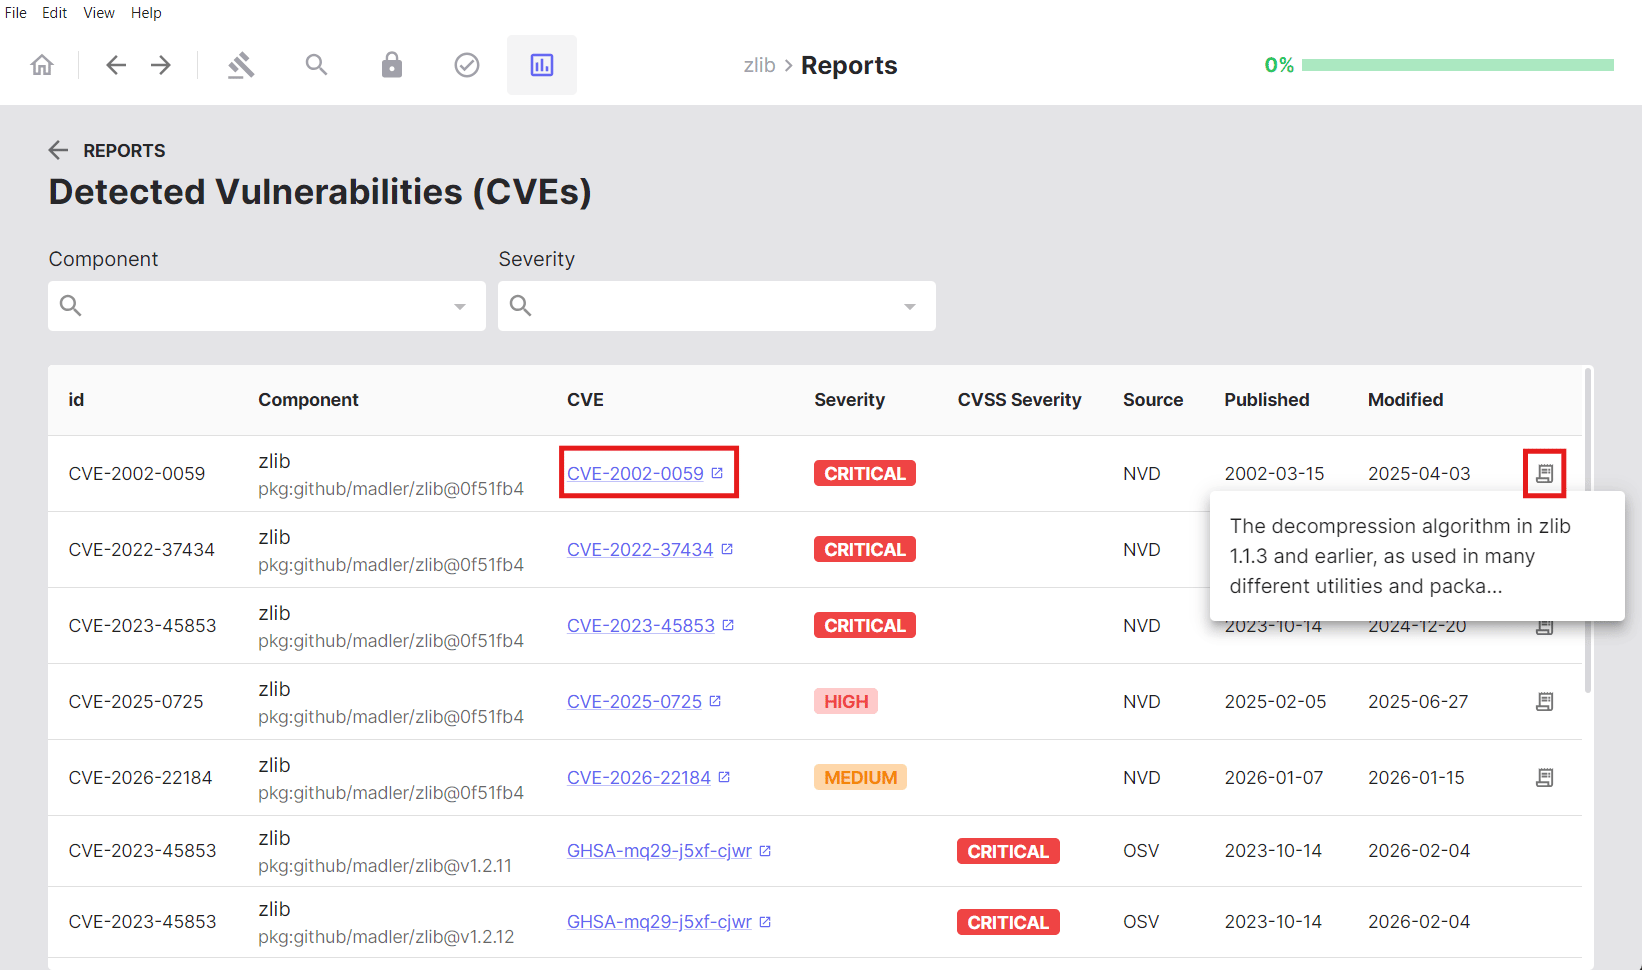
How Vulnerabilities Are Determined
Vulnerabilities are not a fixed property of a file, they are looked up by the component and version that is reported for that file. This means the CVEs you see always follow the identification, not the raw file contents. This has a practical consequence you should be aware of when auditing. If a file is reported under a component or fork that differs from the upstream release you are actually using, the CVEs returned reflect that reported component, not the version you expected. As of this, the Report separates vulnerabilities into two tabs that reflect two different sources of truth:- Detected: vulnerabilities of the components the scan identified automatically.
- Identified: vulnerabilities of the components you concluded and identified.
Cryptography
This section displays the total count of cryptographic algorithms detected across your entire project.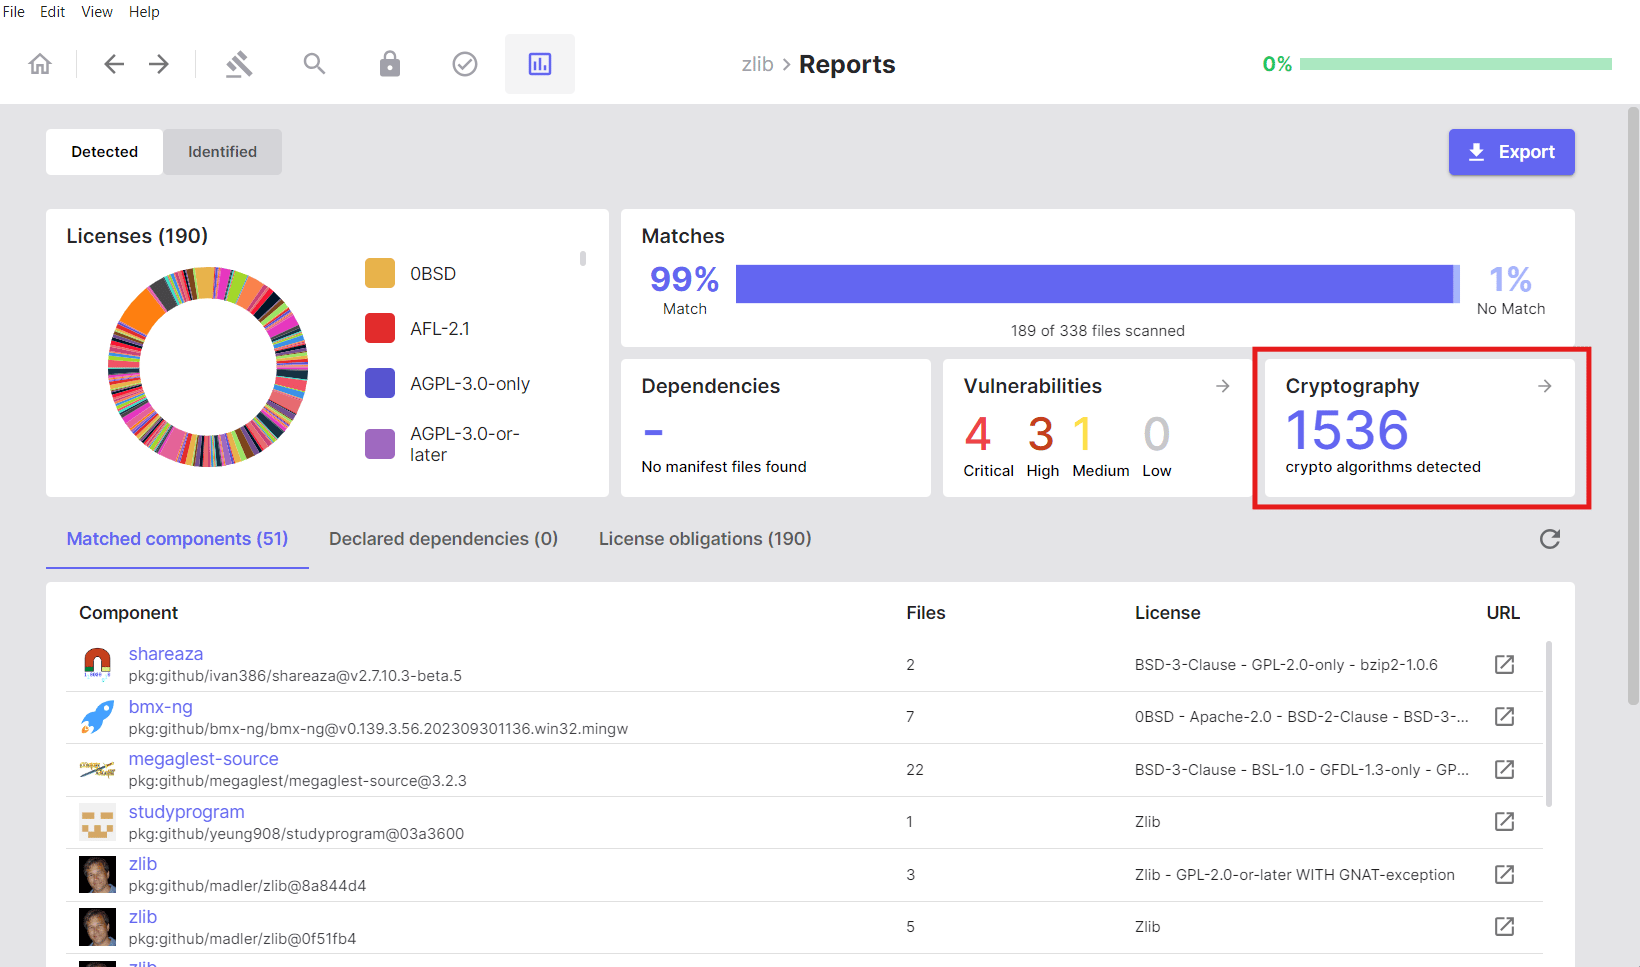
Local Cryptography
Shows cryptographic algorithms detected by analysing your source code files locally. This represents crypto usage in your own codebase.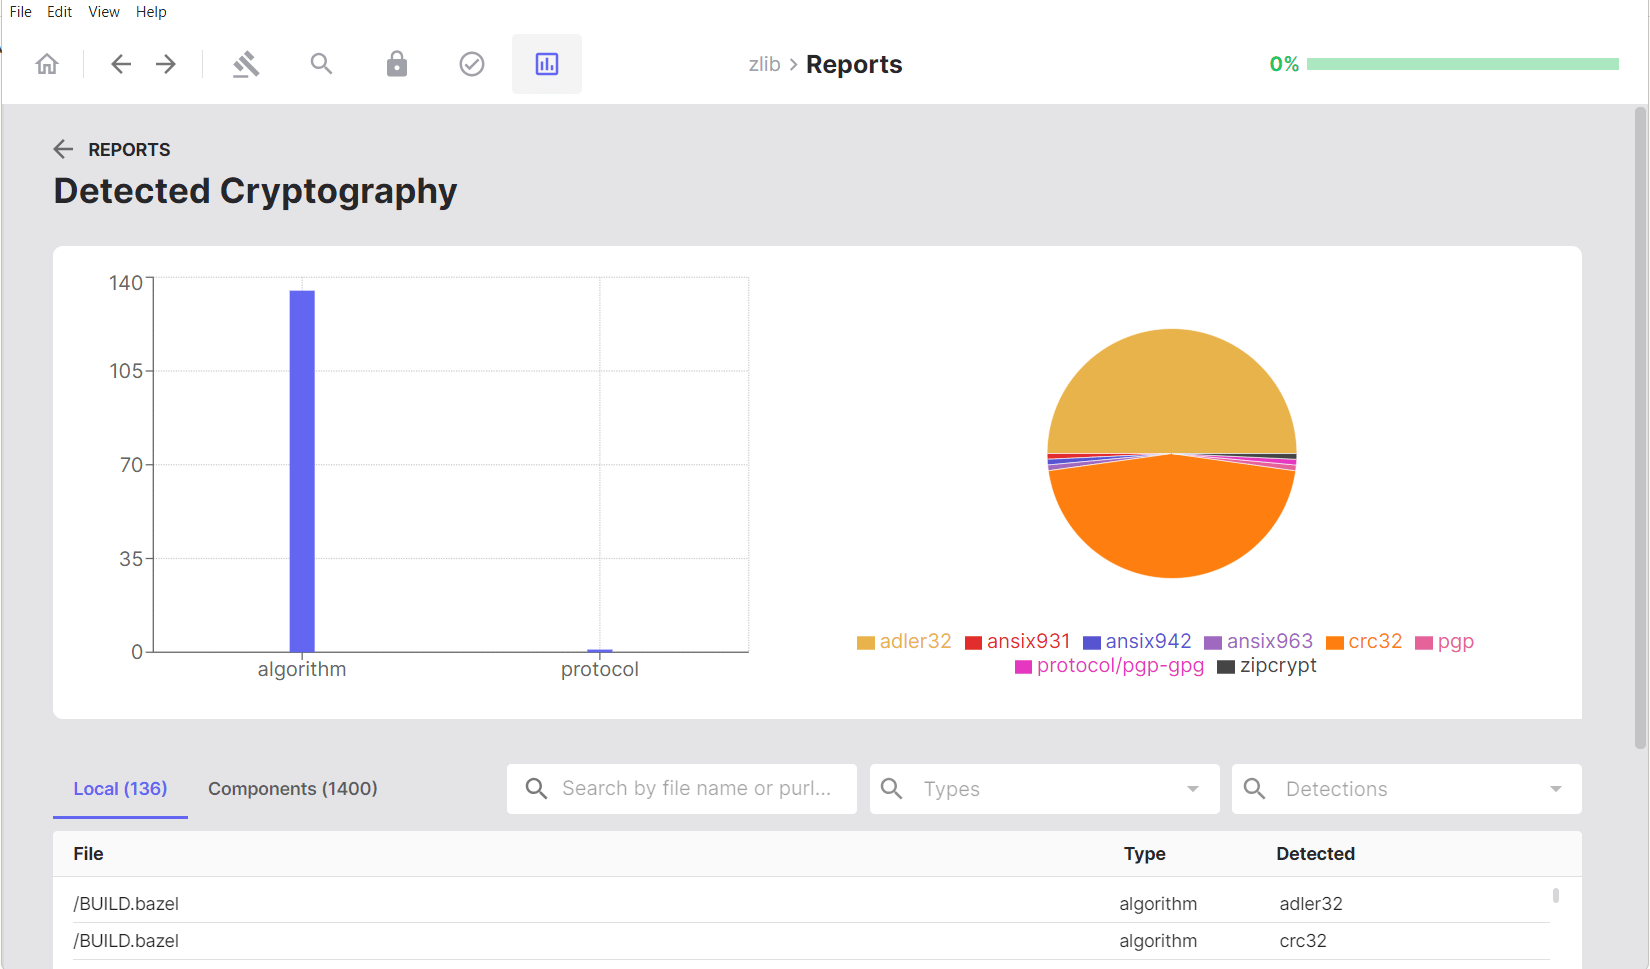
Components Cryptography
Shows cryptographic algorithms found in matched components and dependencies. This represents crypto capabilities provided by third-party libraries and components in your project.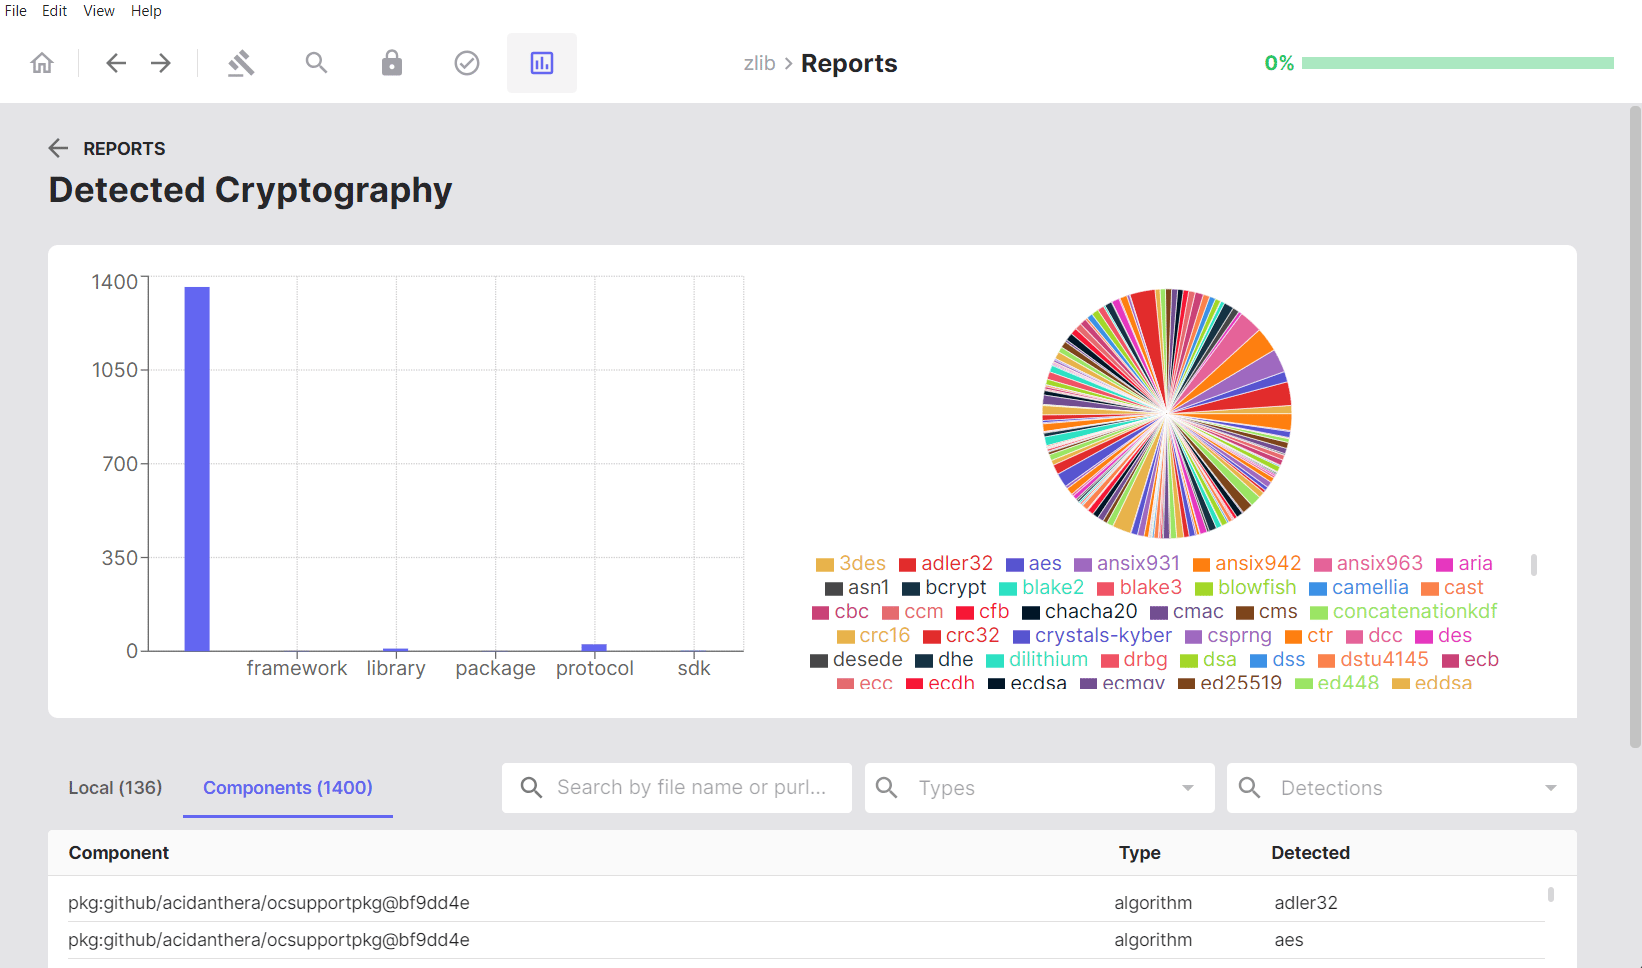
Visual Analytics
Visual analytics include:- Bar chart: Shows detections by type
- Pie chart: Illustrates the proportion of each detected algorithm, offering a view of cryptographic diversity
Viewing Crypto in Files
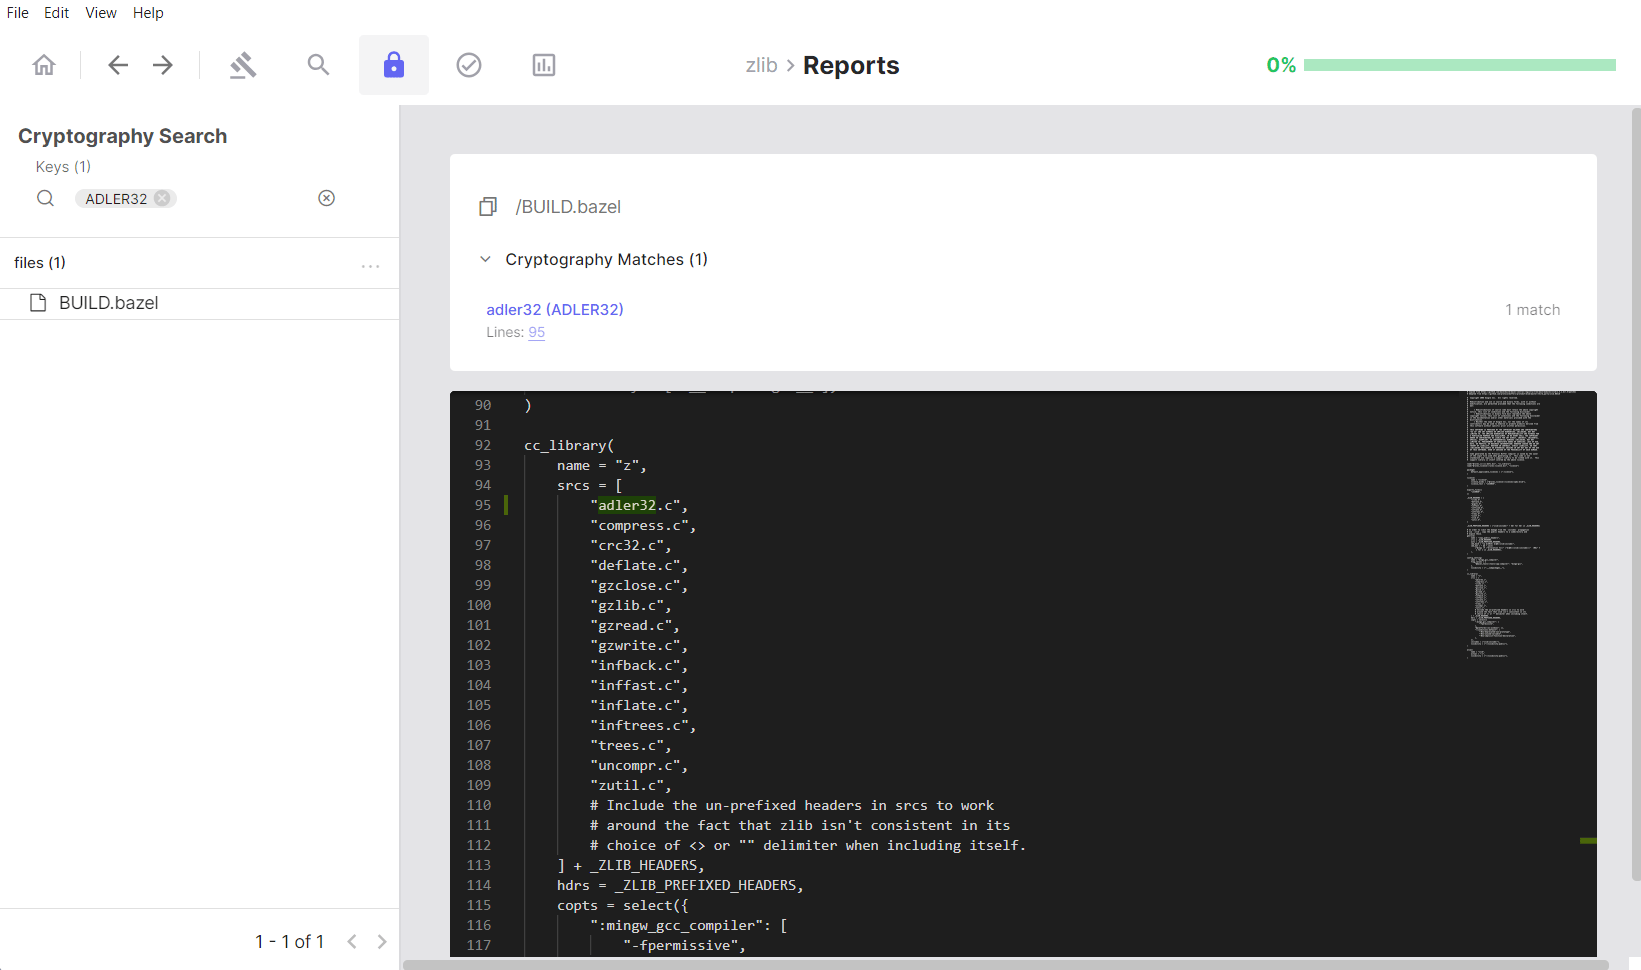
In the Local tab, clicking on either the file name or the detected algorithm opens the Cryptography Search page, where you can view the source code containing that cryptographic algorithm highlighted for easier review.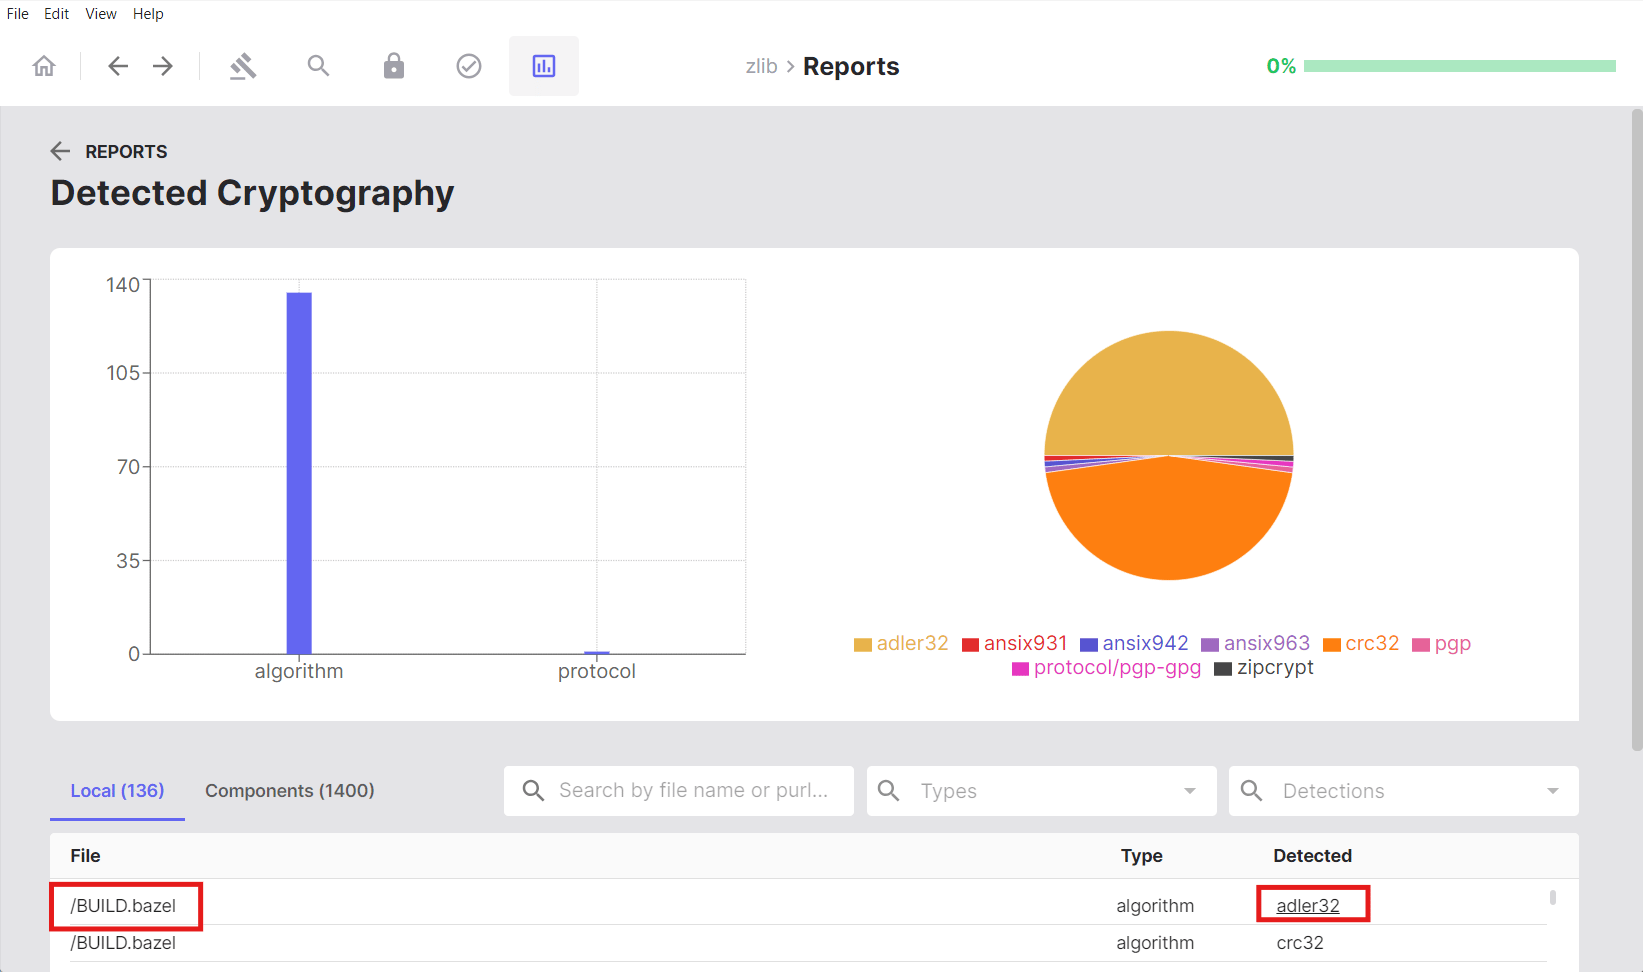
Limitation: Cryptography detection identifies algorithm usage via keyword matching, it does not perform static analysis or assess whether a detected algorithm is weak, deprecated, or otherwise insecure. Treat this as an inventory of what’s used, and evaluate the security implications of each algorithm separately.
Licenses
When viewing the Licenses section in the Reports tab, clicking on a specific license filters the matched components list to show only components associated with that license, making it easy to review all components under a particular licensing term.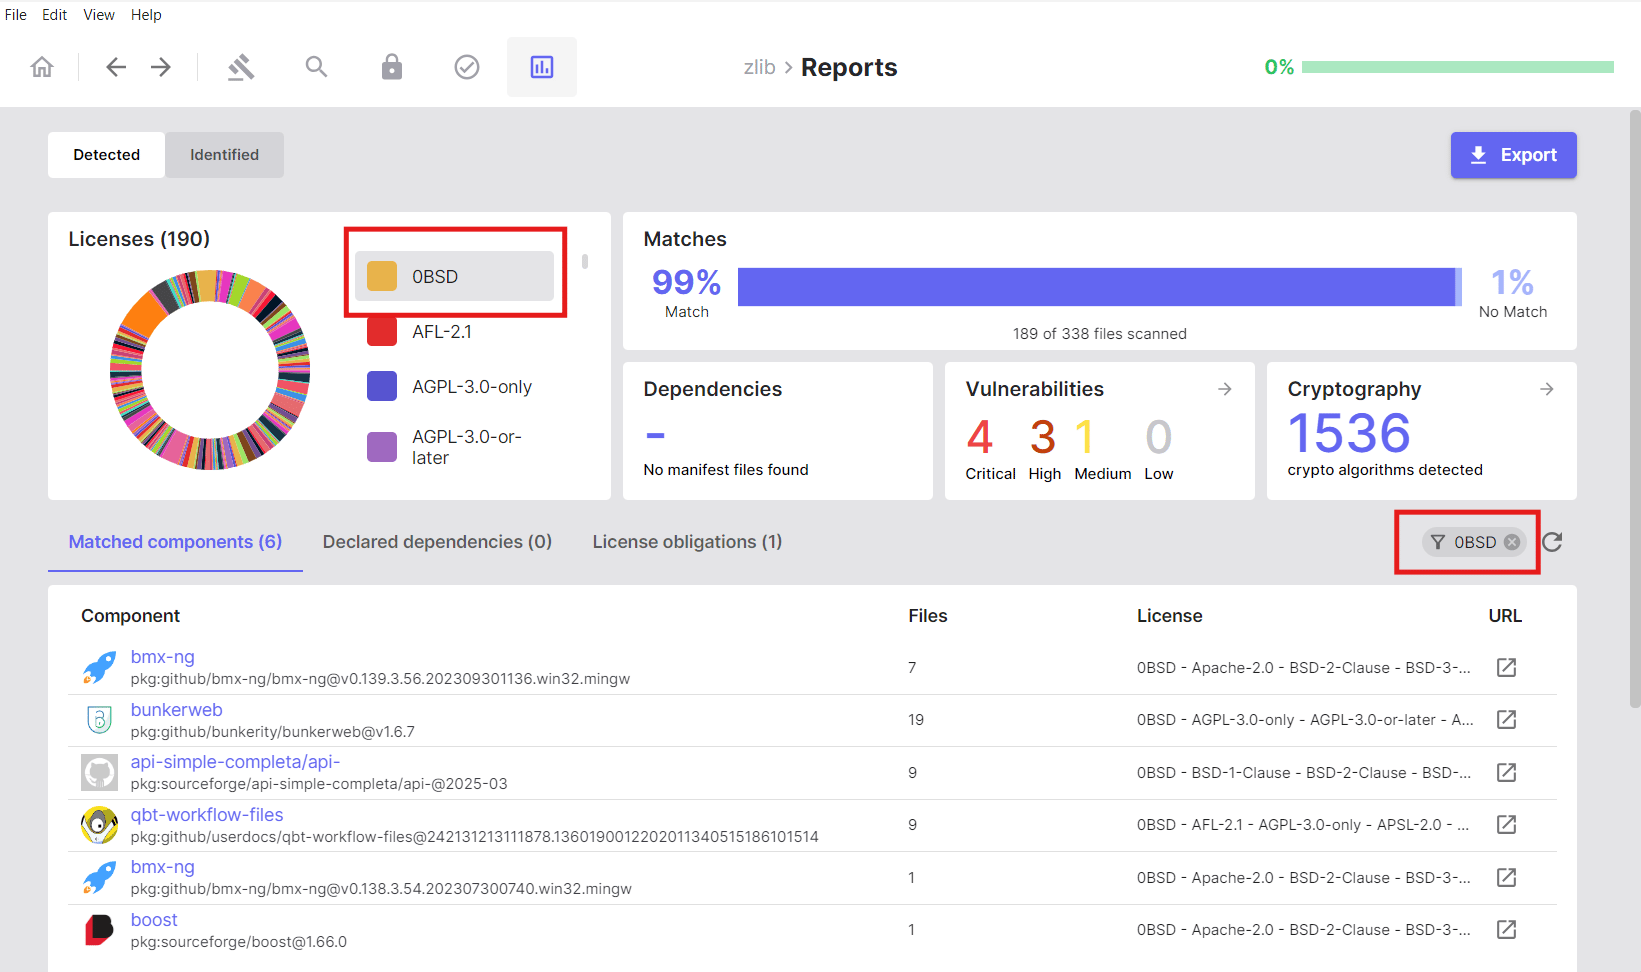
License Obligations
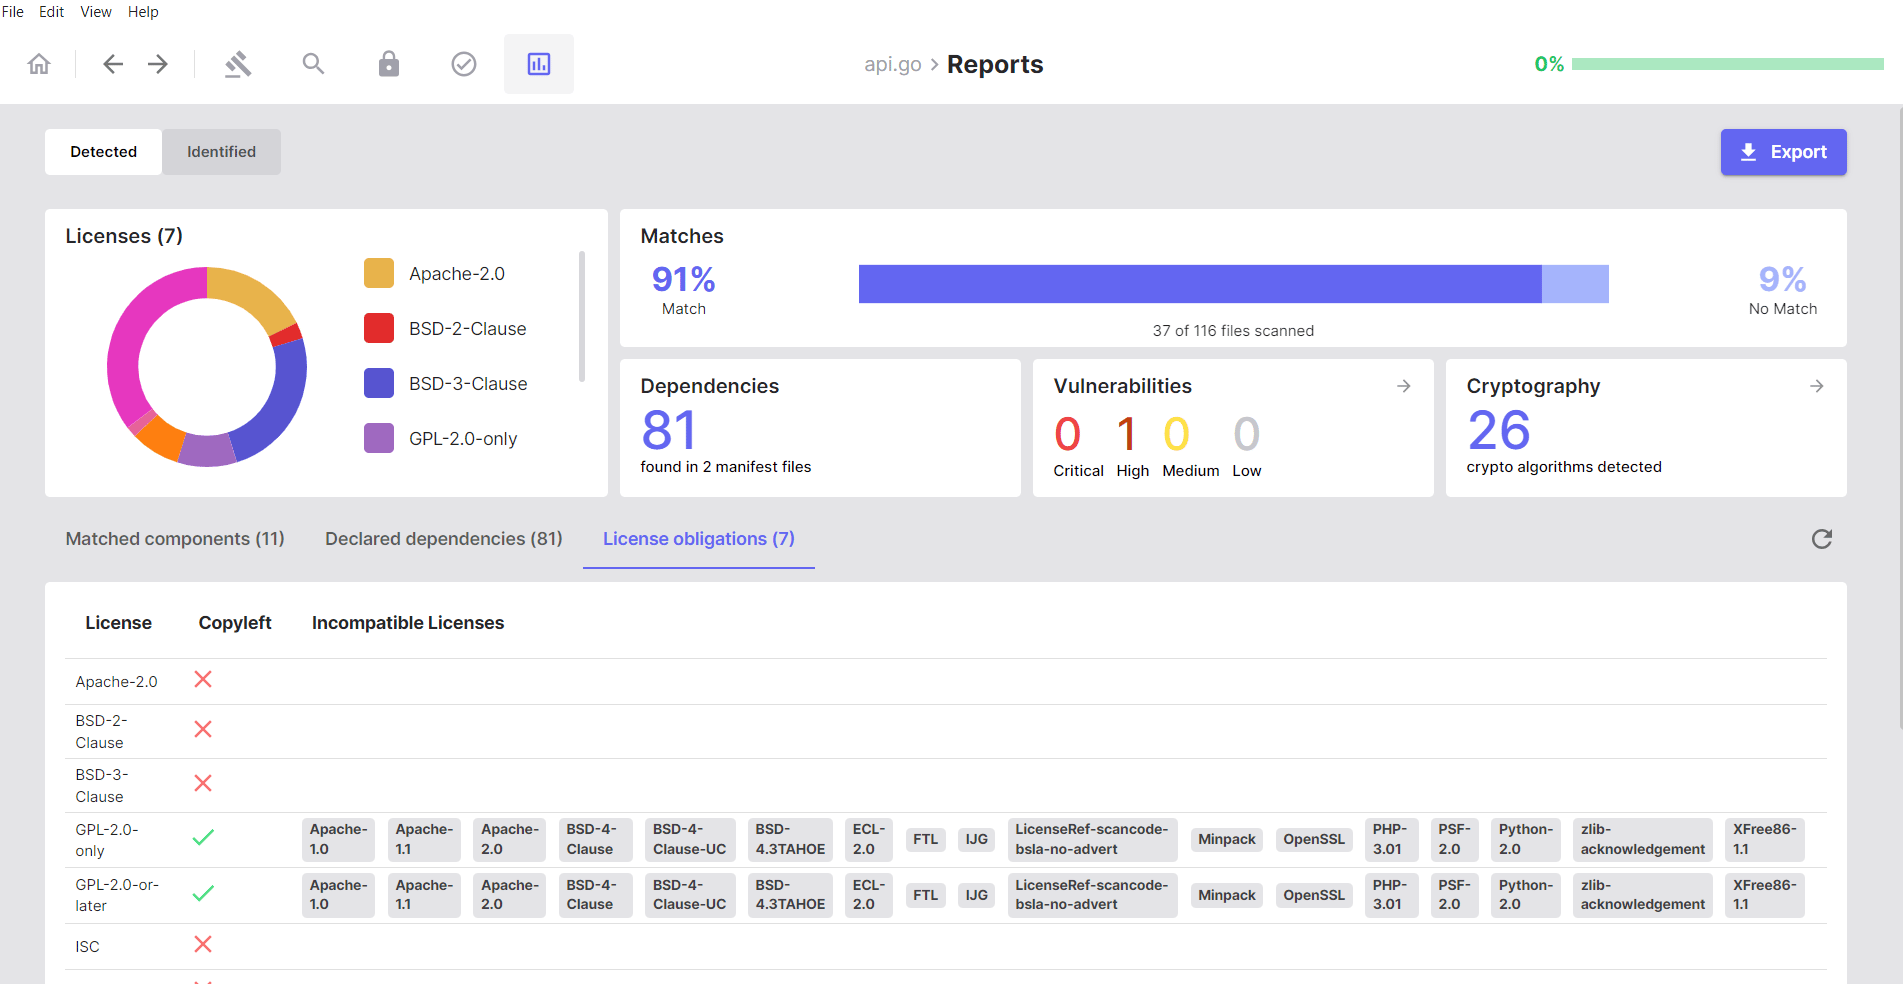
Use this section to view any licenses that may conflict with your project’s licensing strategy. SBOM Workbench analyses your project’s license landscape and identifies:- Incompatible license combinations
- License conflicts
- Copyleft implications
Identified Tab: Your Audited Results
- What it shows: Components you have explicitly reviewed and confirmed
- When to use: After auditing to see your curated, approved results
- Key characteristic: Only displays components where you’ve taken identification actions
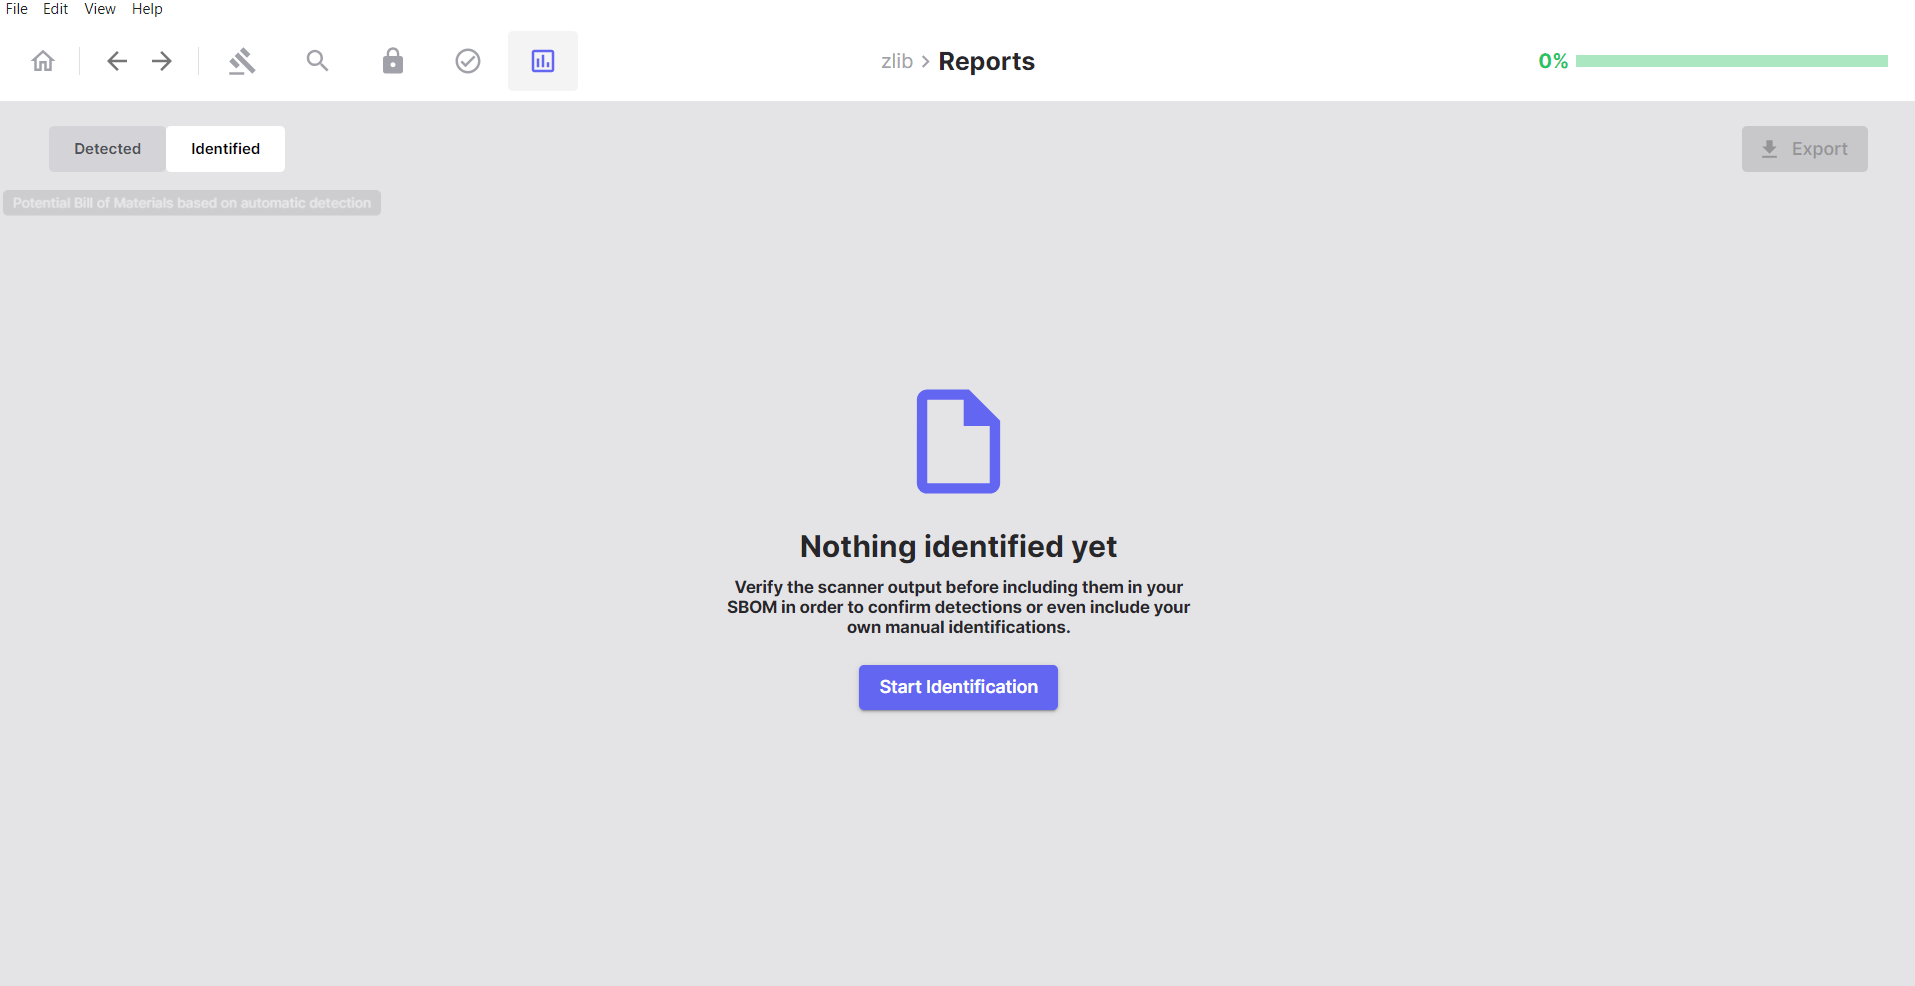
Note: Initially, the Identified tab will be empty until you start reviewing and accepting matches from the Detected tab.
What You’ll See After Identification
Once you have started identifying your components and dependencies, the Identified tab will populate with your verified results: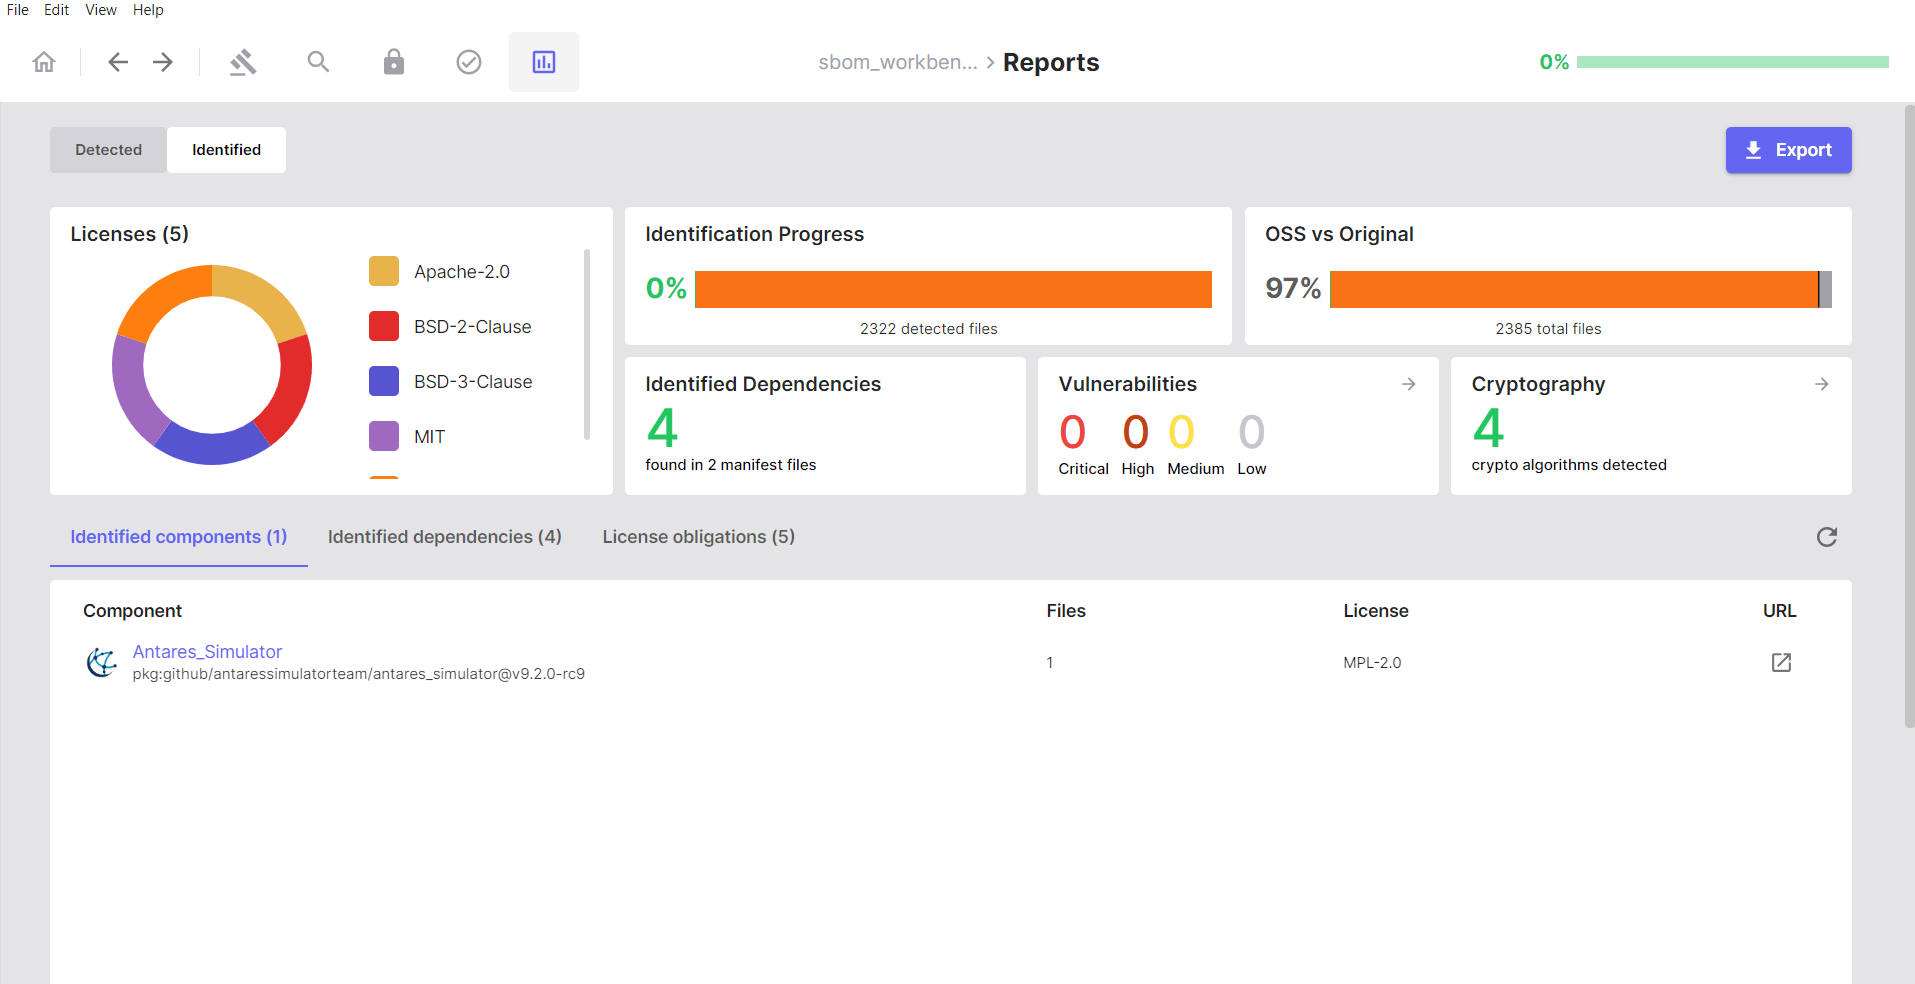
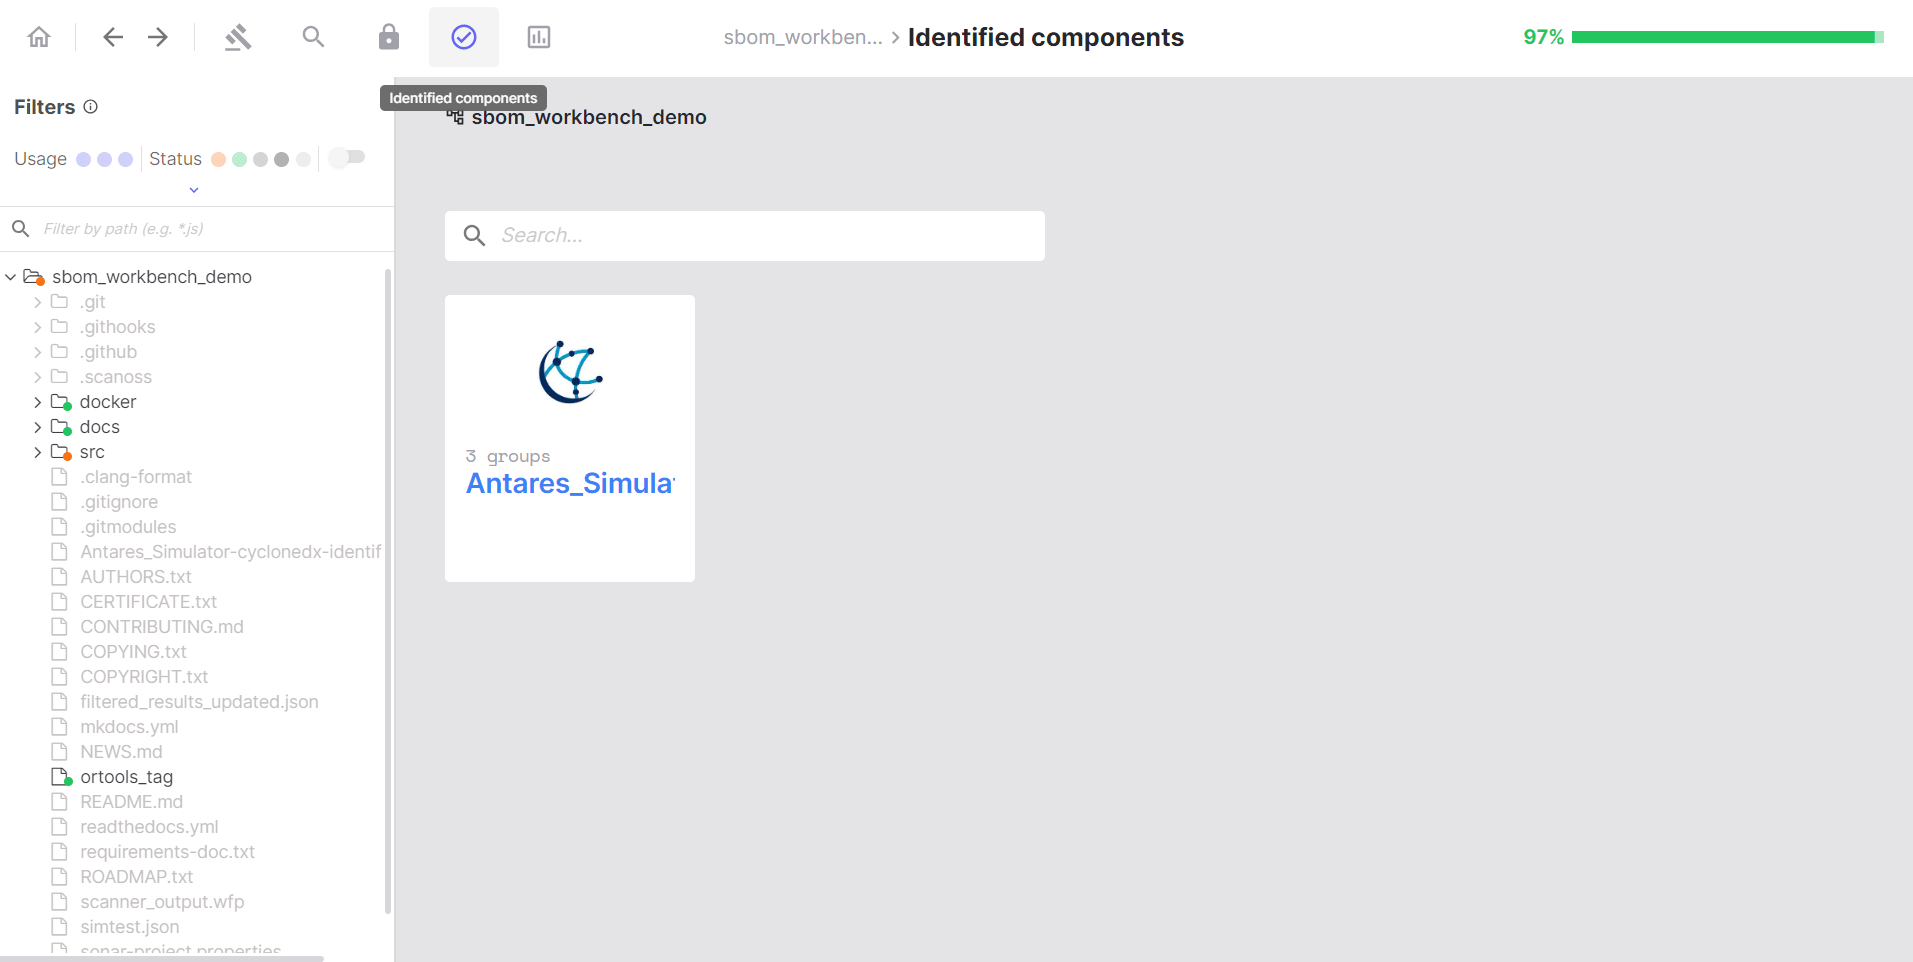
Auditing Your Project
Working with Detected Components
The Detected Components tab is where you review and interact with the component matches found during your scan. This is the primary interface for auditing your scan results and making identification decisions.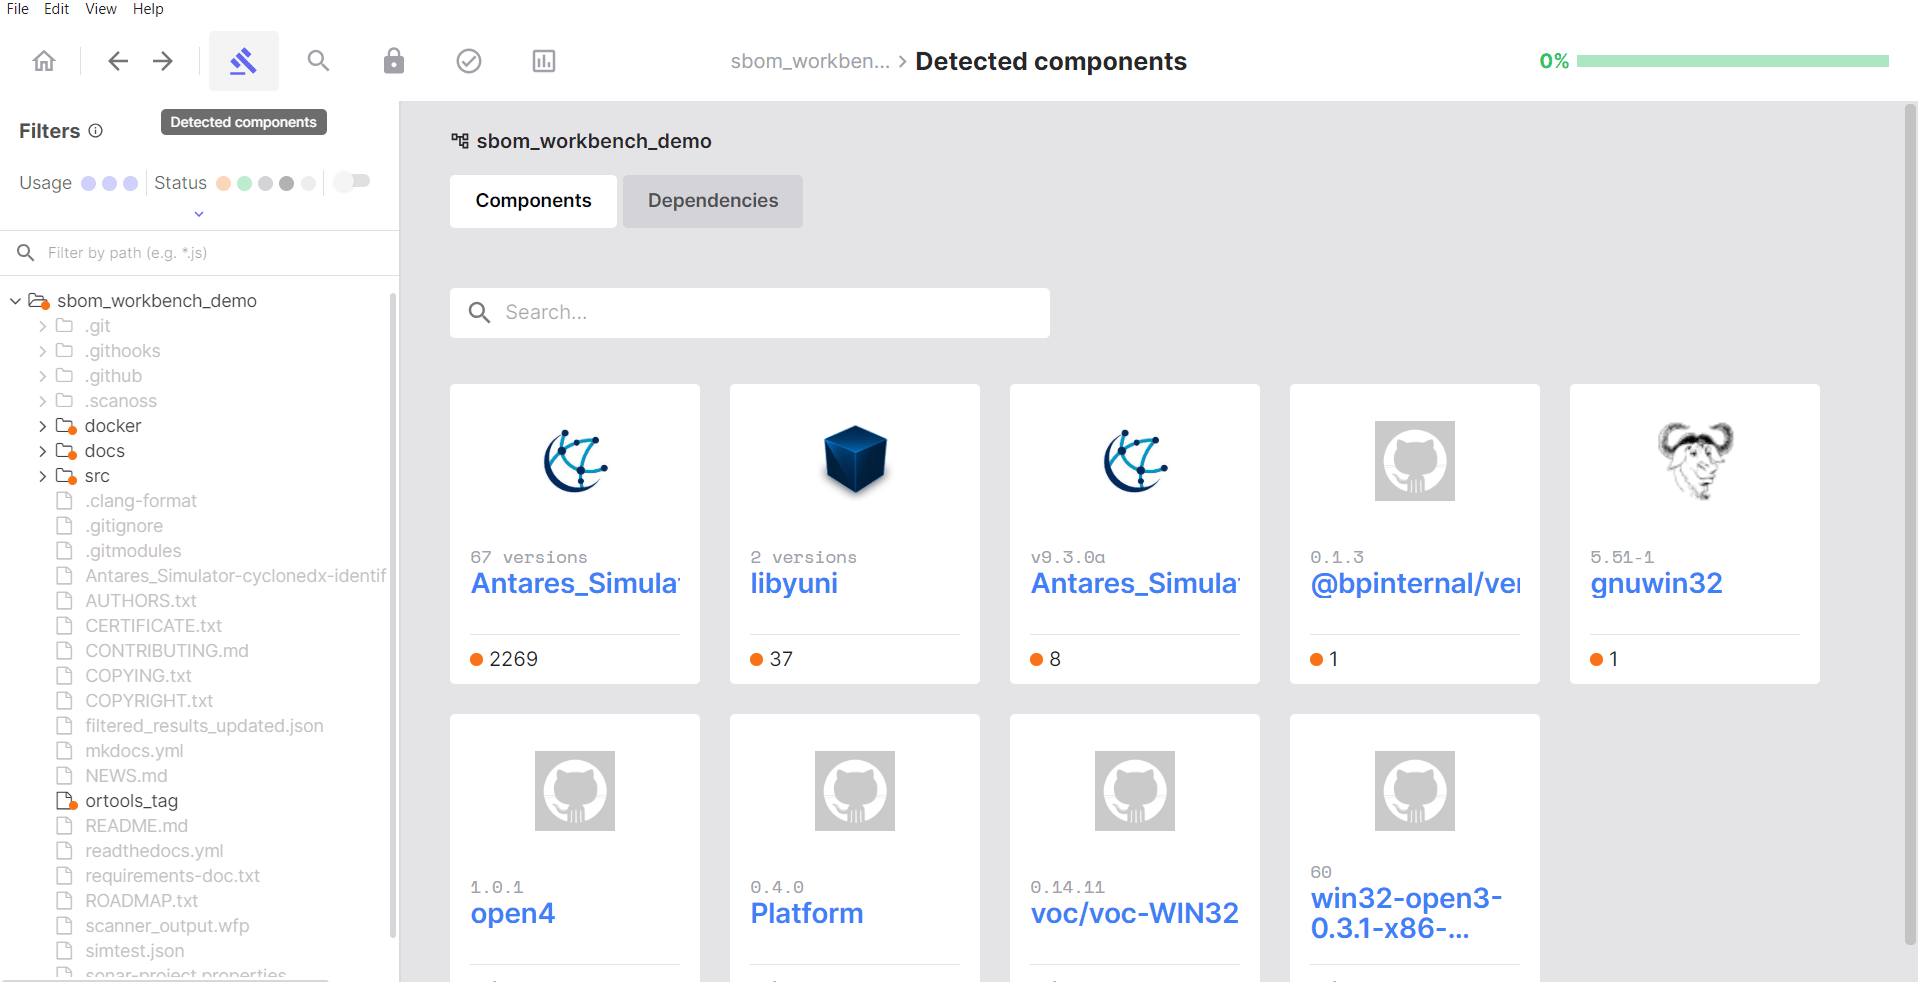
Understanding the Interface
File Status Indicators
The files in your project tree are displayed on the left with visual indicators to help you navigate and filter the results: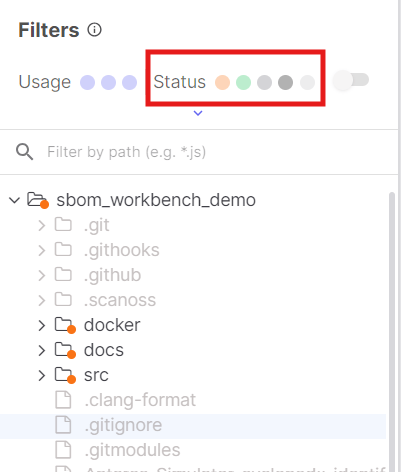
- Pending: Files match the SCANOSS database (pending review)
- Identified: Identified files (you’ve accepted these)
- Original: Original files (you’ve marked these as your own code)
- No Match: Scanned files but no match was found
- Ignored: Filtered files and NOT scanned
Filters
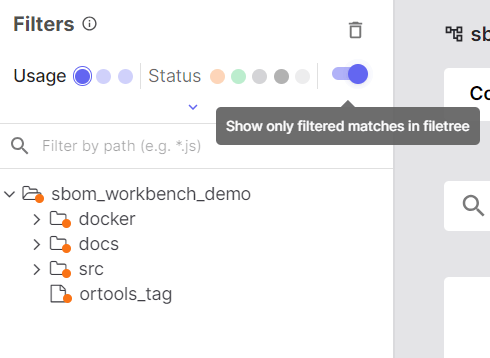
Use filters to focus your audit workflow: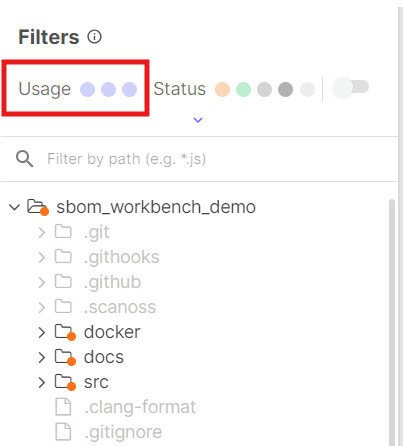
- File: Show results based on full file matches (100% matches)
- Snippet: Show results based on snippet matches (<100% matches)
- Dependency: Show results based on project dependencies
Component Cards
Component cards are the grouped visual containers in the file tree that organise files by their matched component.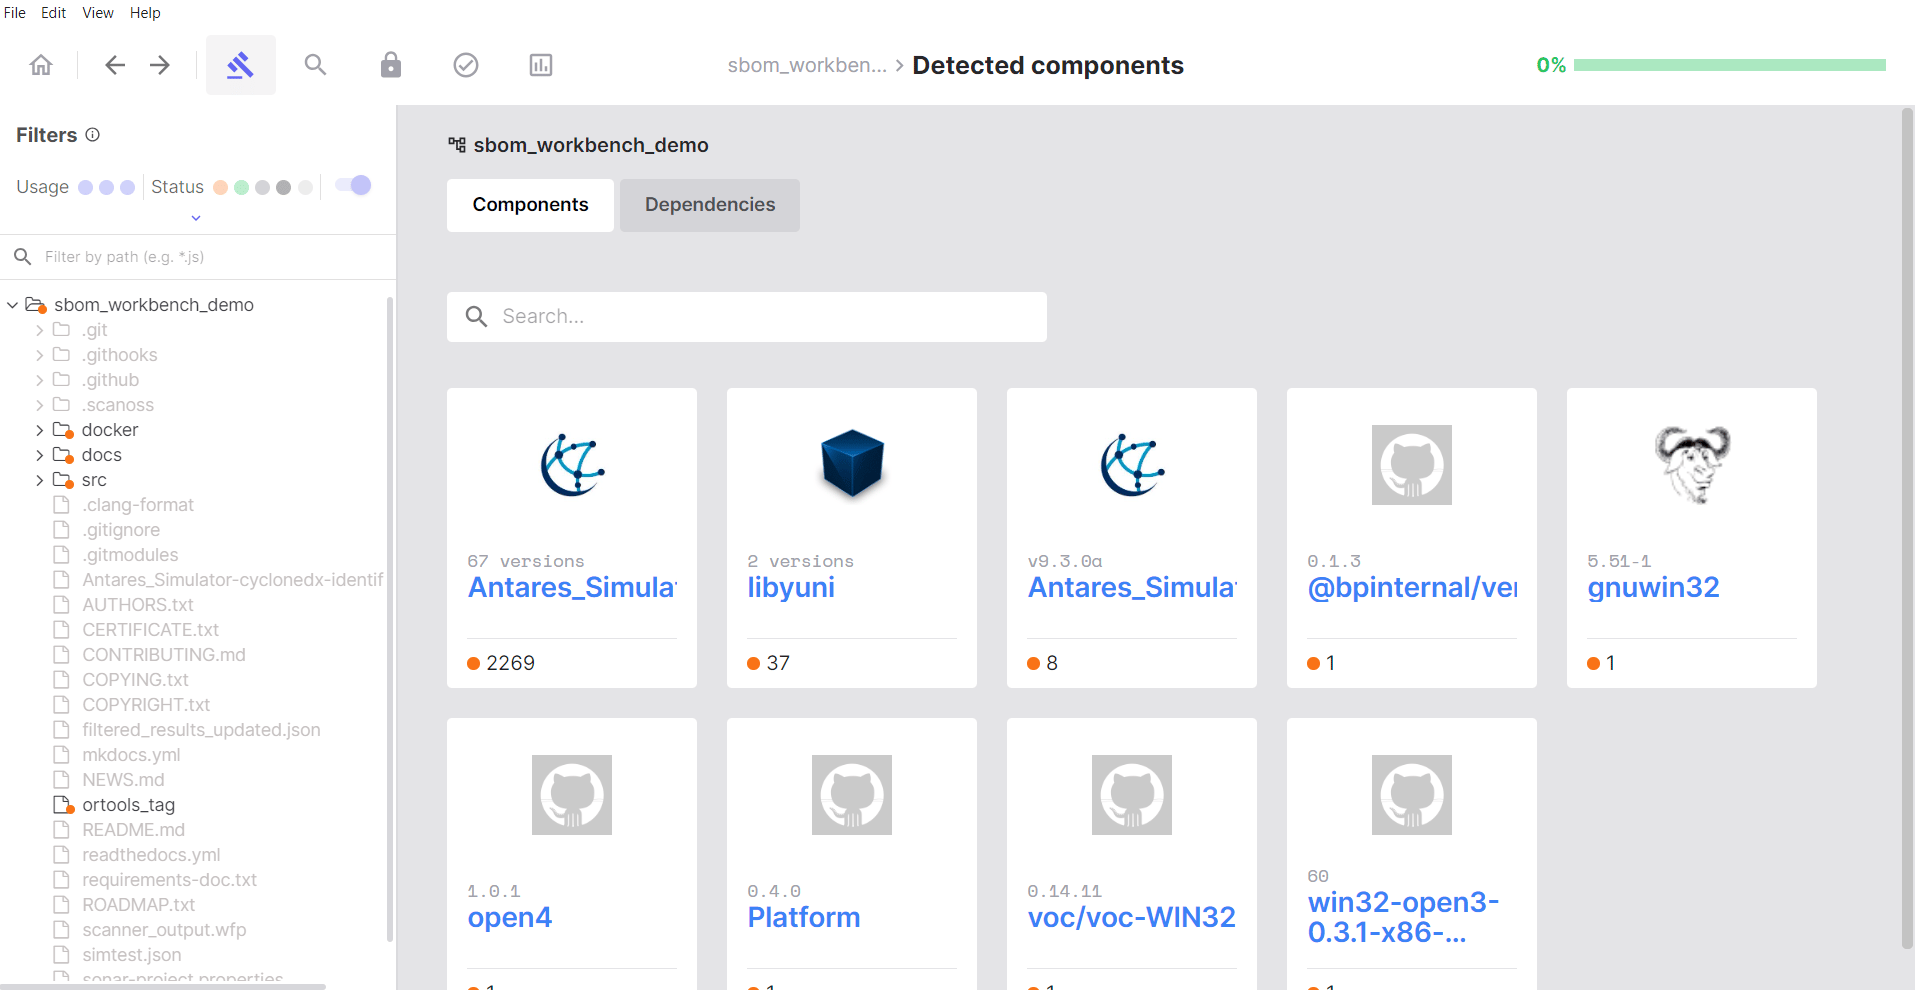
- A single open source component that was detected
- All files in your project that matched that component
- A way to review and take action on multiple files at once
Identifying Components
The identification process is the core of auditing your project. For each component match, you need to decide whether to accept it, modify it, or mark it as your original code.The Identify Process
To review and act on individual files within a component card:- Expand the component card to see all files that matched
- Click on a file to view match details in the code viewer
- Review the match percentage and source code comparison
- Make your decision:
- Click Identify to accept the match
- Click Mark as Original if it’s your own code or a false positive
Using the Identify Dialog
When you click Identify, a dialog will appear:- Component name: Pre-populated from the match
- Version: Detected version (you can modify if incorrect)
- License: Associated license
- PURL: Package URL that identifies the component
- URL: Repository link
- Usage: File / Snippet / PreRequisite
- Notes field: Add your reasoning and context
Manual identification uses a single PURL field, there is no separate Version field. Enter the full Package URL with the version included, inAs soon as you save the identification, Workbench automatically re-queries the vulnerability service for that component and version and updates the results, you do not need to re-scan the project. The refreshed CVEs then appear under the Identified tab (see How Vulnerabilities Are Determined).purl@versionform, for examplepkg:github/torvalds/linux@6.12.35. The field validates the PURL format as you enter it.
Marking as Original
Use Mark as Original when:- The match is incorrect or a false positive
- The code is actually your own
- Code similarity is coincidental
Re-scanning and Identification Persistence
When you re-scan a project that already has confirmed identifications, SBOM Workbench preserves your previous identification decisions by design. This ensures that your audit work is not lost between scans.How Re-scan Behaviour Works
- Previously confirmed components remain in their confirmed state after a re-scan, even if the underlying source code has been modified (e.g. adding debug code to an OSS-derived file). This is expected and intentional behaviour.
- If the scan detects a new or larger snippet that provides a more accurate match than a previously confirmed identification, the updated result may require re-validation to confirm the new identification.
- If the existing identification is still valid (i.e. no new or improved match was found), no further action is needed, the confirmed state is retained automatically.
Modifying a Previously Confirmed Identification
If you need to update or change a confirmed identification after a re-scan, there are two ways to do this depending on how the original confirmation was applied:- File-level identification: If the confirmation was applied at the file level, navigate to the file in the file tree, open the file identification view, and use the Remove identification button to clear the existing decision. You can then re-identify the file as needed.

- Component-level identification: If the confirmation was applied at the component level, navigate to the component view, where you can use the Restore All option or manage individual file statuses directly.

Tip: Use the Snippet filter in the Detected Components view to quickly locate files matched via snippet detection, making it easier to review modified files after a re-scan.
Reusing a Project as It Evolves
As your codebase gains new features and releases, you’ll want to re-scan it without redoing your entire audit each time. The Re-scanning and Identification Persistence behaviour above applies when you re-scan the same project in place. When you instead track each release as its own Workbench project, SBOM Workbench maintains continuity through a structured project lifecycle and the Import identifications from feature, described below. Before walking through the workflow, it’s worth clarifying a common misconception about what actually carries your audit forward.What scanoss.json Does (and Doesn’t) Persist
In SBOM Workbench, scanoss.json is a rules-based configuration file, not a complete record of your project state. It stores include / remove / replace rules that are applied during scanning, and it can pre-apply known decisions to help reduce repeated manual triage on subsequent scans.
What it does not do is restore your full Workbench audit state. Prior confirmations, UI-level decisions, notes and project history are not reconstructed from scanoss.json alone.
In some other SCANOSS tools, scanoss.json plays a broader persistence role. In SBOM Workbench specifically, treat it as a mechanism for scan tuning and rule reuse, not as a substitute for your saved project.
To preserve full audit state, export your Workbench project as a .zip archive (see Exporting a Project). The project archive, not scanoss.json, is what lets you restore or transfer a complete audit.
The Project Lifecycle Workflow
Follow this cycle to carry identification decisions from one version of a repository to the next:- Run the initial scan - Create a new Workbench project from the repository and complete the first scan.
- Perform full component identification - Complete the baseline audit: review detected components, confirm correct matches, correct misidentified components, and mark internal or false-positive code appropriately.
- Export outputs and preserve project state - Once the baseline audit is complete, export your SBOM reports in your preferred format (SPDX, CycloneDX, CSV, etc.). At this stage you can also:
- Export and retain
scanoss.jsonfor scan tuning, identification-rule reuse, and dependency/context configuration. - Export the Workbench project as a
.zipfile to preserve the full audit state locally for backup or transfer.
- Export and retain
- Update the repository and re-scan - When the source code evolves with new features or changes, update the repository and run a new scan in SBOM Workbench. Ensure the previous Workbench project is still available in your dashboard. If it has been removed, use Import Workbench Project to restore it from the previously exported
.zip. - Import previous identifications into the new scan - After scanning the updated project, navigate to Detected Components, right-click the top-level folder in the file tree, and select Import identifications from. Choose the previous version of the same project, proceed through the import flow, and review the preview of identifications to ensure all prior decisions are correctly mapped to the new scan results.
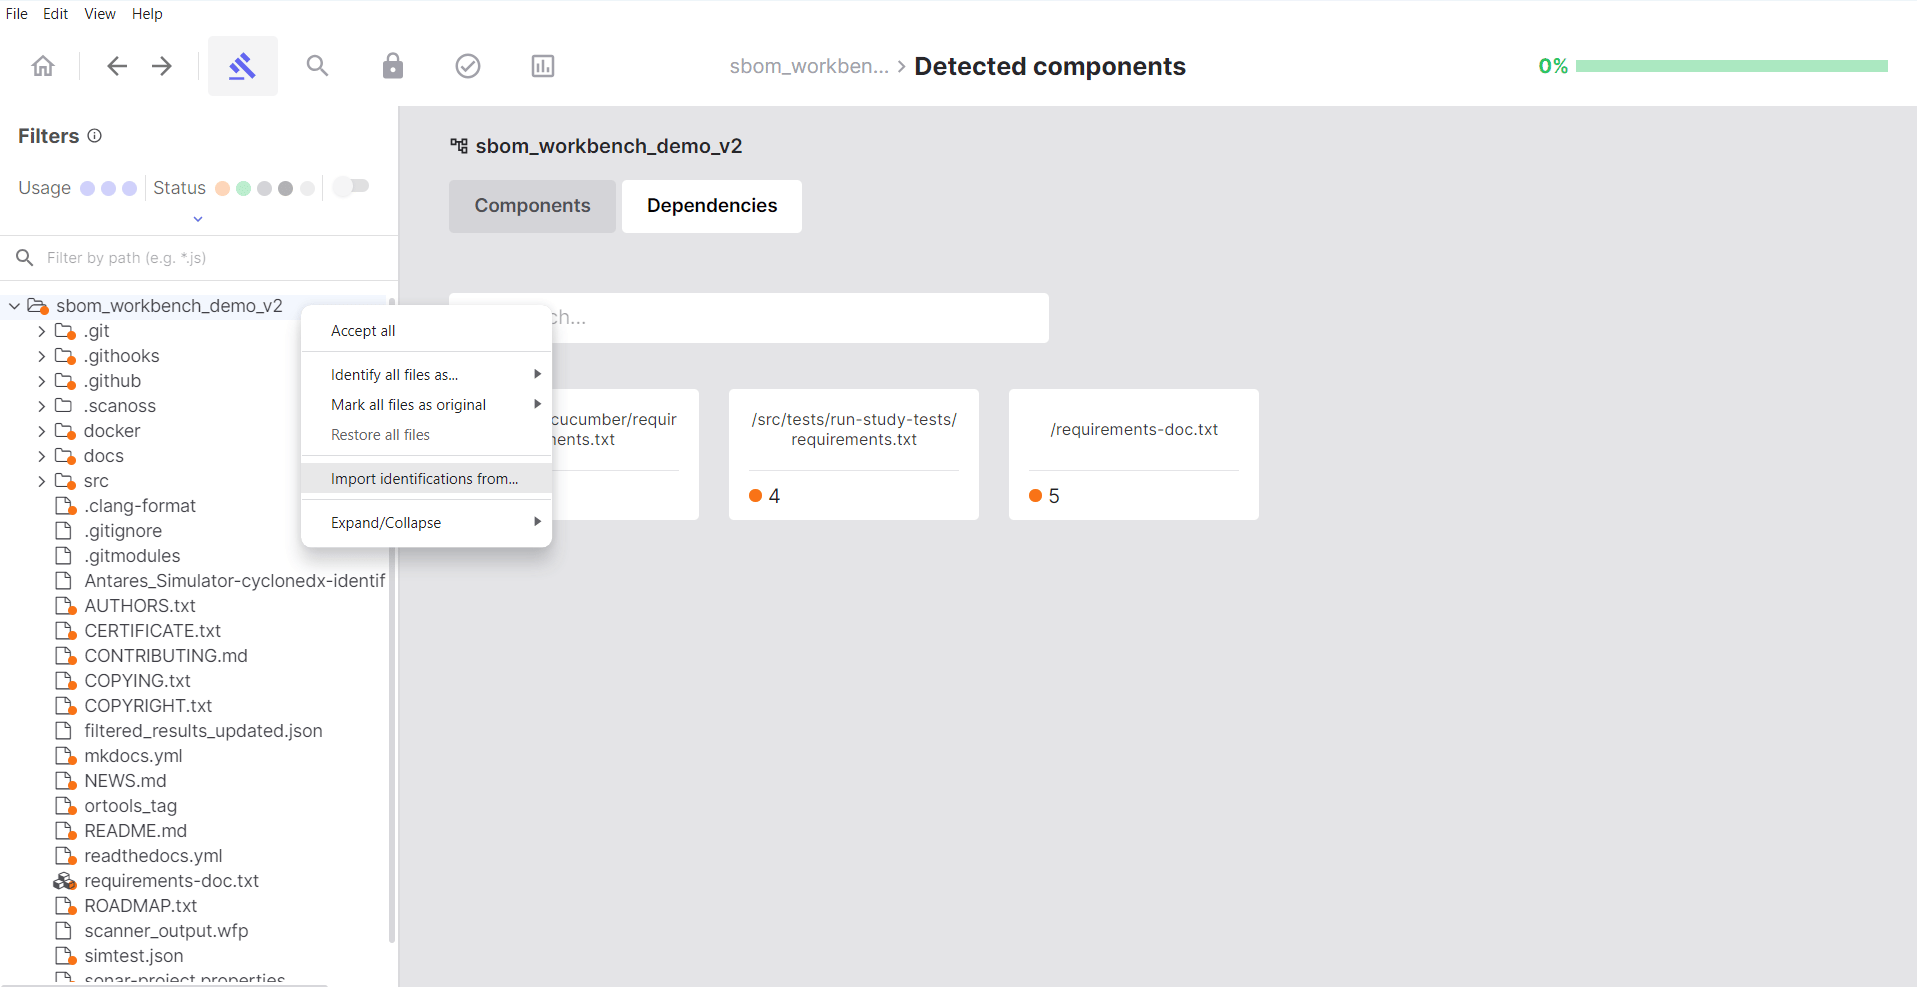
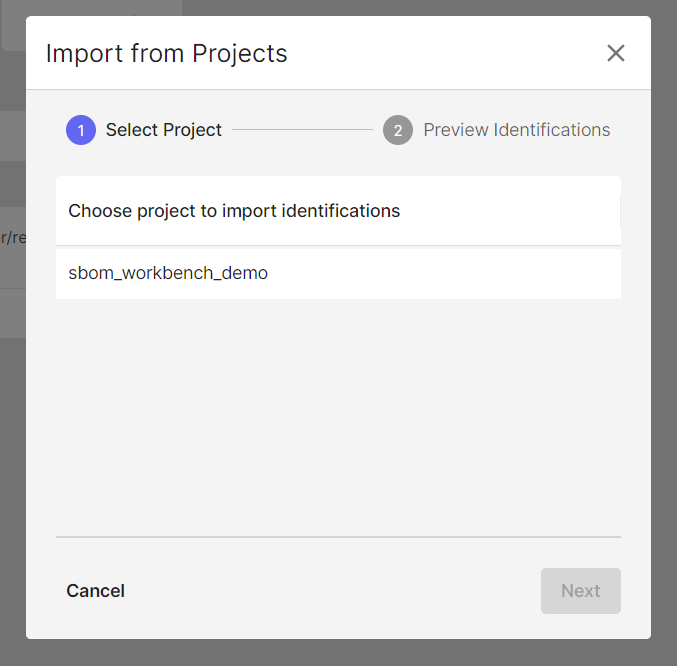
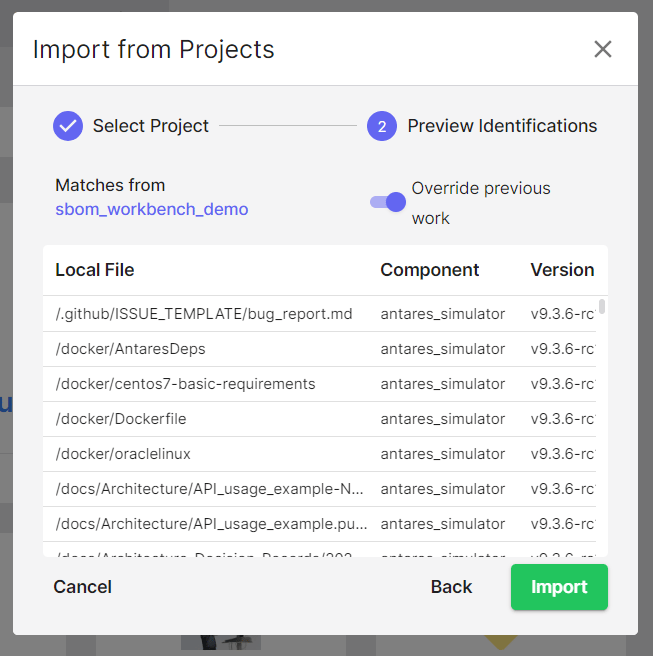
Enable Include dependencies during the import flow to carry forward dependency identifications alongside component identifications. The preview shows dependency matches next to component matches, resolved by manifest path and PURL, so a dependency you already reviewed in the previous version doesn’t need re-identifying in the new one.
- Review only new or changed components - Once the import completes, SBOM Workbench carries forward your previous identification decisions, so your focus shifts only to the newly introduced or changed components in the updated version.
- Repeat for each release - Every new version follows the same cycle: update repository → scan → import previous identifications → review delta changes → identify new components → export updated outputs.
If a project is deleted and recreated, its audit state is not recoverable unless you import the original Workbench project.ziparchive.scanoss.jsonalone cannot reconstruct full audit history or prior UI-level decisions.
Managing Dependencies
When your project contains dependency manifest files, they appear in the Dependencies section.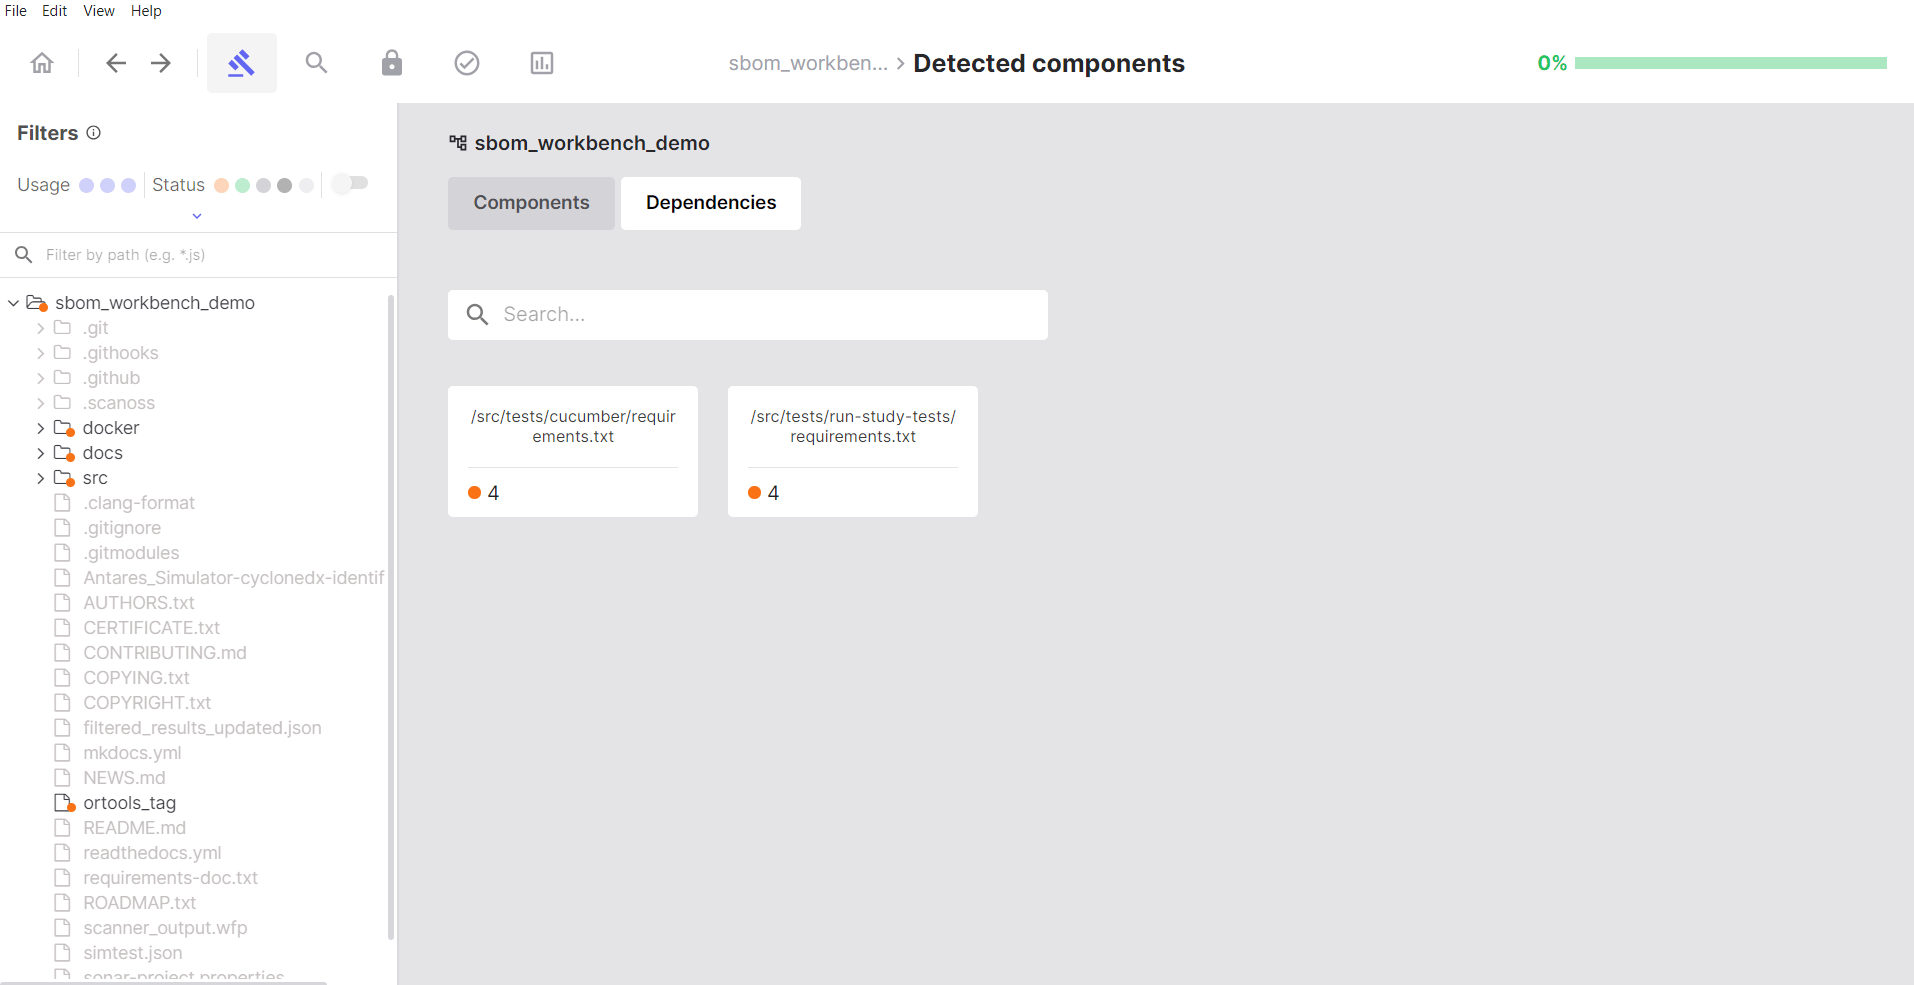
Accepting Dependencies
- Click on a dependency manifest file
- Review the list of declared dependencies
- Hover over each dependency
- Click Accept to confirm it’s intentionally used
Dismissing Dependencies
Click Dismiss for:- Development dependencies not included in production
- Transitive dependencies you want to exclude
- False positives in dependency detection
Dependency Status
- Pending: No action taken yet
- Identified: You’ve confirmed this dependency
- Dismissed: Excluded from your SBOM