Prerequisites
Before you begin, make sure you have:- An existing GitLab repository
- A valid SCANOSS API key (required only for enterprise features)
How It Works
This section describes how SCANOSS integrates with your GitLab CI/CD pipeline to perform automated code scanning and licence compliance checks. The SCANOSS GitLab component runs inside your GitLab pipeline and automatically scans your code for security vulnerabilities and licence compliance. On merge requests (MRs), it posts a summary comment and creates pipeline status checks directly on the MR. When triggered manually or on a schedule, results are uploaded as pipeline artifacts.Configuration
GitLab Access Token Setup
Before configuring CI/CD variables, you need to create a GitLab access token with the appropriate permissions. You can create one of three token types:- Project Access Token — Scoped to a single project
- Group Access Token — Scoped to all projects within a group
- Personal Access Token — Scoped to all projects you have access to
- Role: Developer or higher (must not be Guest)
- Scopes: Both
apiandread_apiare required - Configuration: The token should be masked and hidden, but not protected
CI/CD Variables
Navigate to your GitLab repository and add the following CI/CD variables: Settings → CI/CD → VariablesTheGITLAB_TOKENrequires both theapiandread_apiscopes to post comments and update merge request statuses.
Basic Pipeline Setup
Add the SCANOSS component to your.gitlab-ci.yml using the include keyword
with $CI_SERVER_FQDN to reference your GitLab instance:
The version suffix@1pins to the latest1.xrelease. You can pin to an exact version by specifying the full tag (e.g.,scanoss@1.3.0).
Component Input Parameters
The SCANOSS GitLab component accepts the following input parameters to customise scanning behaviour.Note: Thescan_pathparameter was previously namedscanPathin older versions of the component. Usescan_path(snake_case) for consistency with all other parameters.
Policy Checks
The SCANOSS GitLab component supports three configurable policies to enforce compliance automatically on merge requests:-
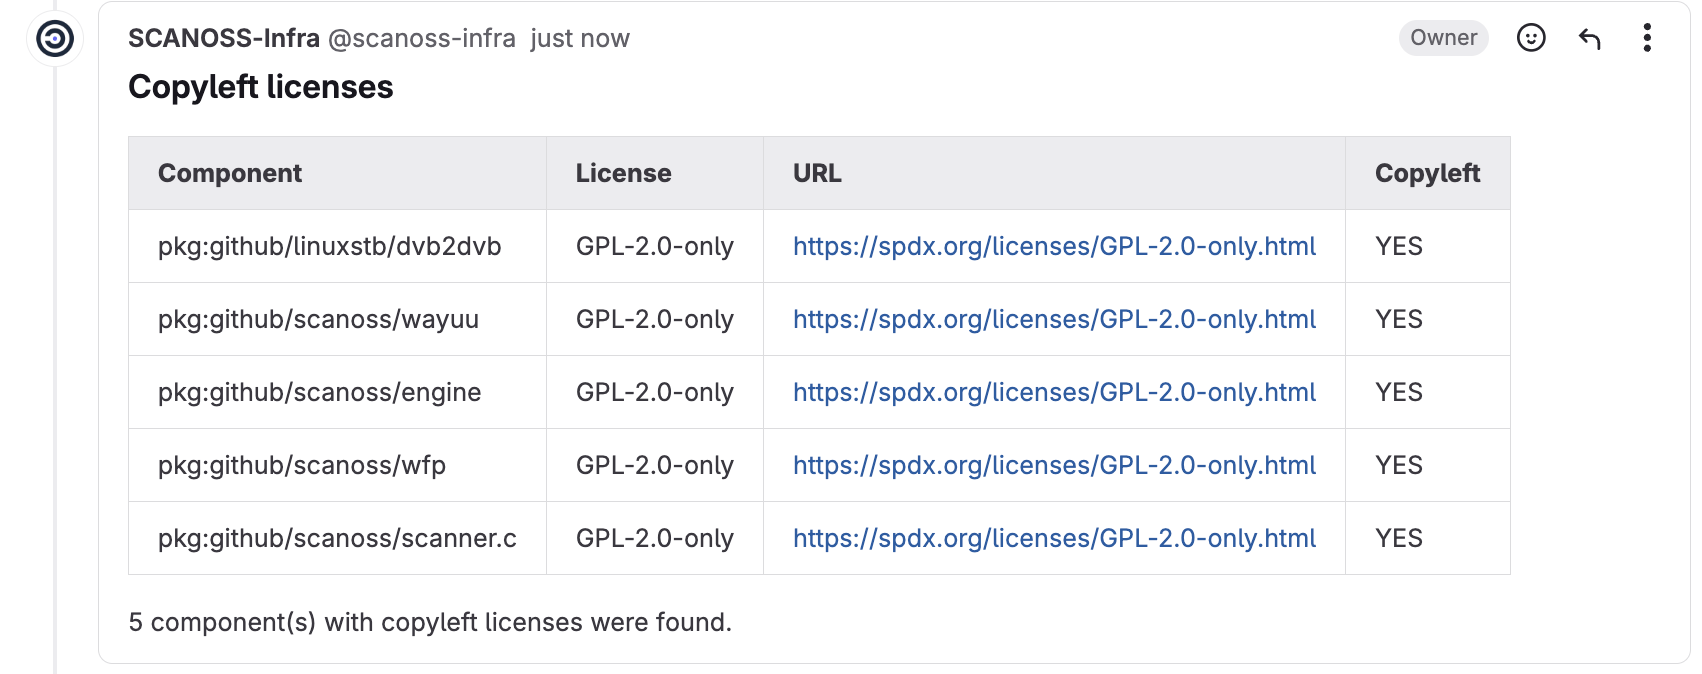
Copyleft (
copyleft) — Detects components or code snippets associated with copyleft licences. If found, the merge request is rejected. The default copyleft licence list is defined in the SCANOSS glc-code-scan repository. -
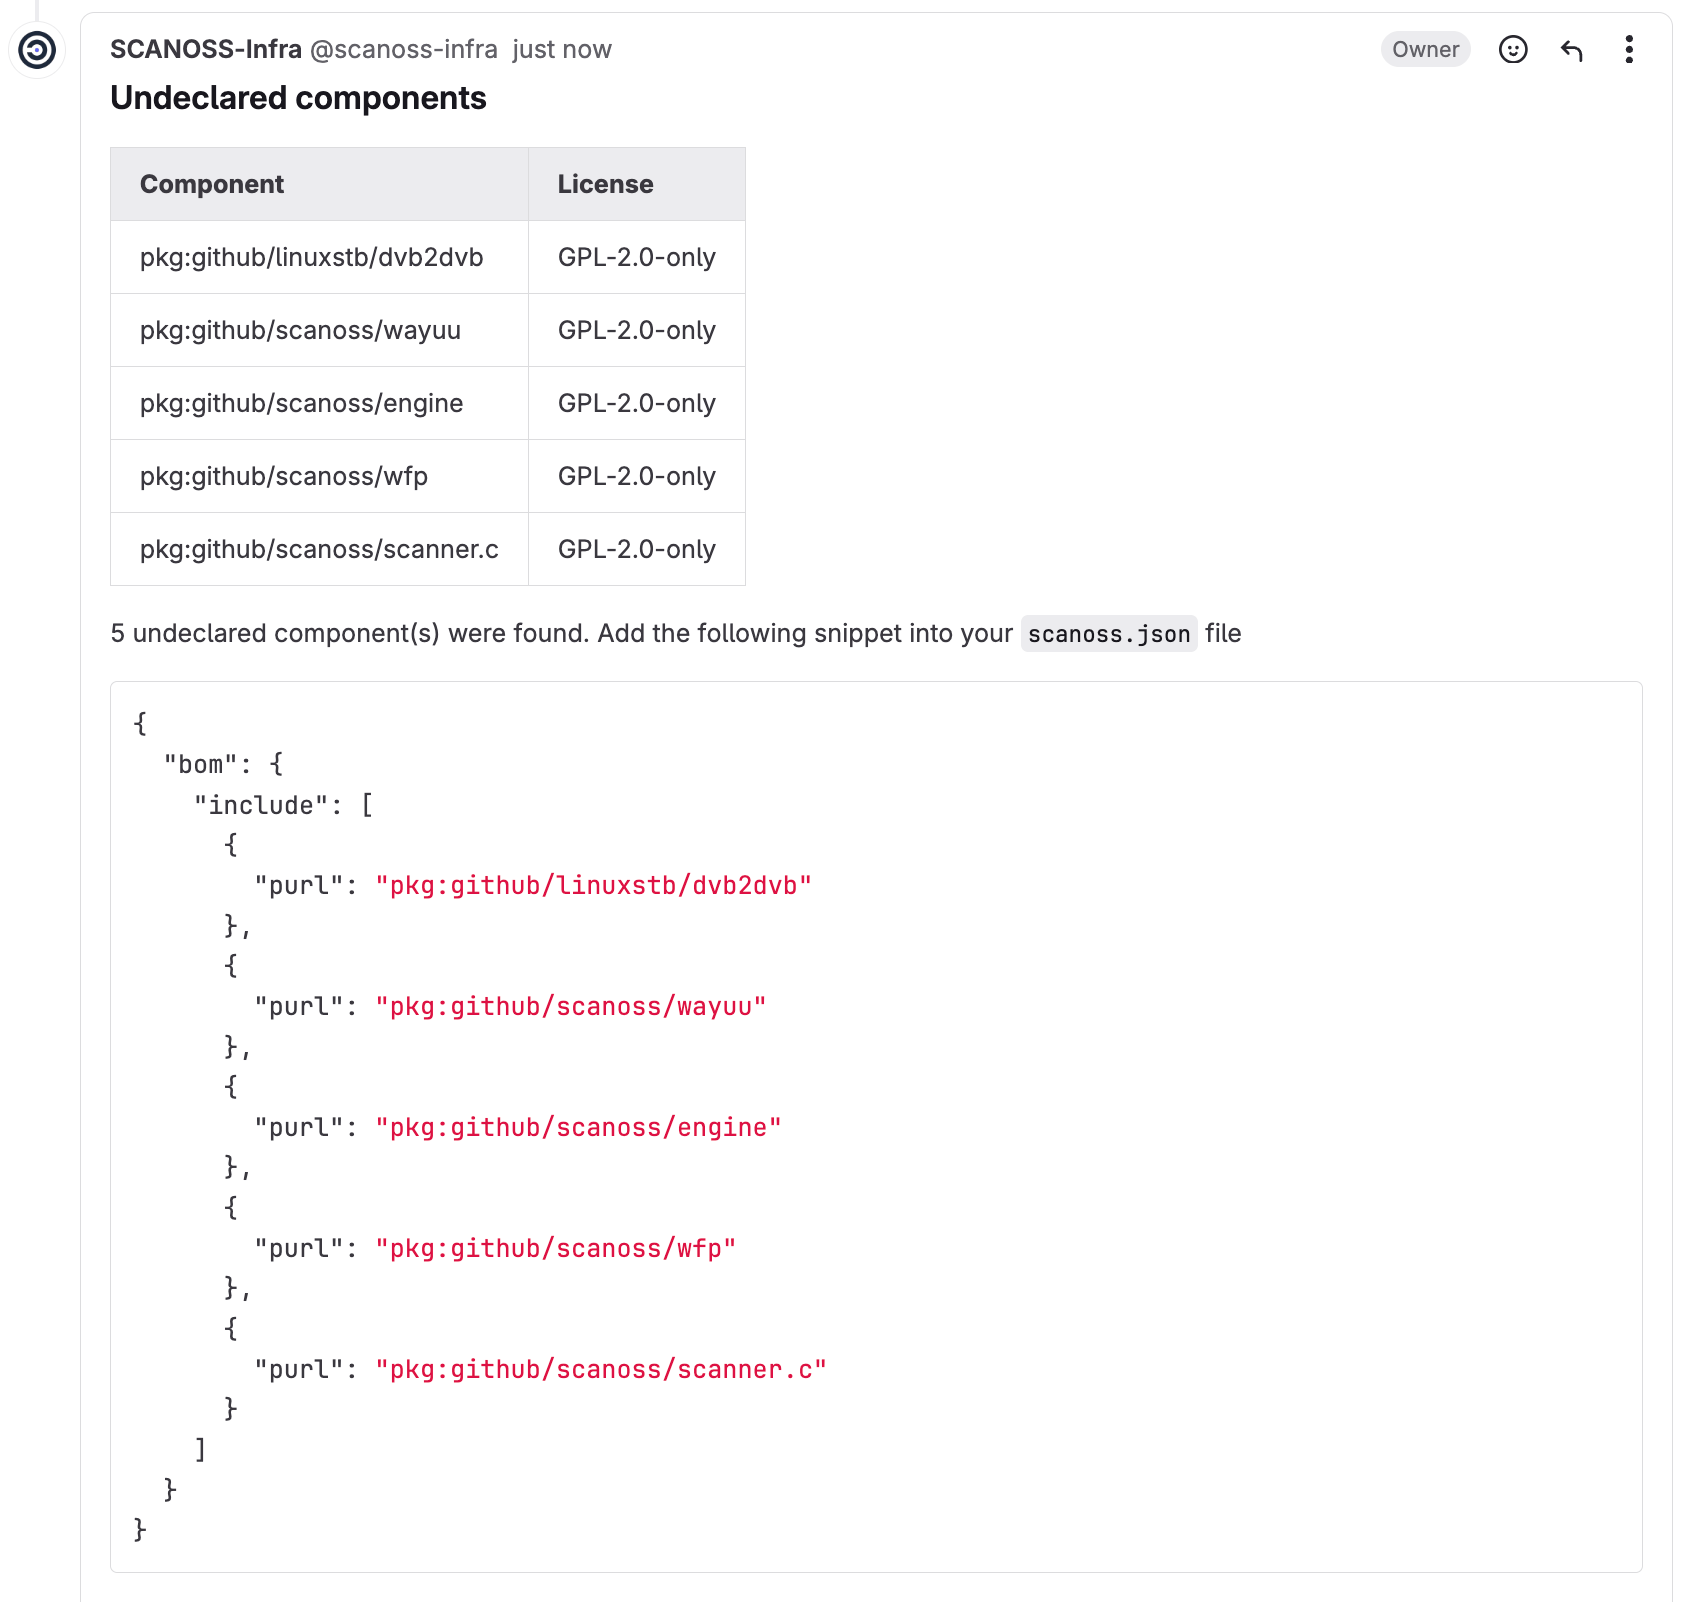
Undeclared (
undeclared) — Compares detected components against those declared in yourscanoss.jsonfile. If undeclared components are found, the MR is rejected. -
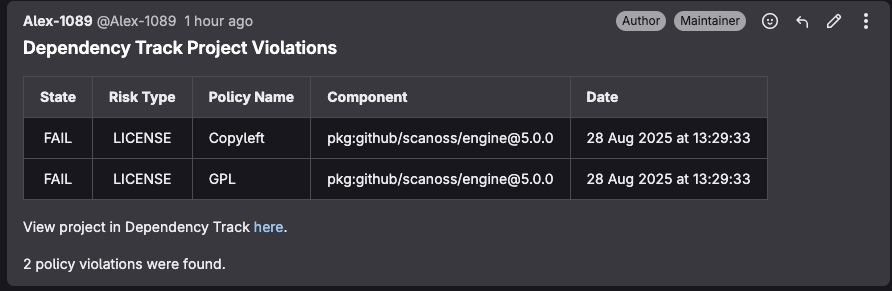
Dependency Track (
deptrack) — Integrates with a Dependency Track server to check for policy violations including security vulnerabilities, licence violations, and compliance issues. The policy check queries an existing Dependency Track project for violations and reports them in the pipeline. Requirements:- Dependency Track server URL and API key
- Either a project UUID or project name and version
- The policy check runs even if SBOM upload is disabled; however, if the Dependency Track project has not been updated recently, results may reflect an outdated component inventory
Pipeline Triggers
In addition to merge request triggers, pipelines can be run manually or on a schedule. Example triggers:Scan Tuning Parameters
The SCANOSS scan engine supports scan tuning parameters for snippet matching.
Scan tuning parameters must be configured through scanoss.json. They are
not configured as component input parameters.
Manage Components with scanoss.json
Thescanoss.json file is used to manage your project’s Software Bill of
Materials (SBOM). It lets you declare approved components, document triage
decisions, and customise scan behaviour to enforce your organisation’s policies.
File Structure and Location
Placescanoss.json in the root of your repository so the SCANOSS component can
detect it automatically:
The scanoss.json file should be committed to Git. It contains your
component declarations and governance decisions that should be
version-controlled and shared across your team.
Recommended .gitignore Configuration
*.wfp— Winnowing fingerprint files generated during local scans.scanoss/— Local cache directory created by SCANOSS tools
scanoss.json— Your project’s SBOM declarations and scan settings
scanoss.json Format
bom.include— Lists all approved components. The scan verifies detected components against this list.bom.remove— Specifies components that must not be present. The scan flags them if found.settings.scan.ignore— Defines file or directory paths to exclude from the scan.
Migration Note for v1.0.0+: If you are migrating from an older version that usedsbom.json, you need to:
- Rename the file from
sbom.jsontoscanoss.json- Update the format to wrap components within a
bom.includestructure (as shown above) rather than a directcomponentsarray- Note that SBOM-related parameters (
sbom_enabled,sbom_file_path,sbom_type) have been removed from the component inputs- The runtime container has been updated to
ghcr.io/scanoss/scanoss-py:v1.46.0or later
Step-by-Step Guide to Populating scanoss.json
Step 1: Run an Initial Scan
Trigger the pipeline without ascanoss.json file. The initial scan will
discover all components in your repository and report them as undeclared.
Step 2: Review Scan Results
Once the pipeline run completes, navigate to the run in GitLab CI/CD and download the scan results from the Artifacts section (scanoss-raw.json by
default).
Step 3: Extract Component PURLs
Review the results file to identify the component PURLs detected in your codebase. These will be used to populate thebom.include section of your
scanoss.json.
Step 4: Create Your scanoss.json File
Create ascanoss.json file in your repository root using the PURLs from the
previous step:
Step 5: Commit and Push
Add thescanoss.json file to version control and push to trigger the pipeline
again.
Step 6: Verify the Results
After the pipeline run completes, the scan should show all previously undeclared components as declared, and no policy violations should be reported.Artifacts
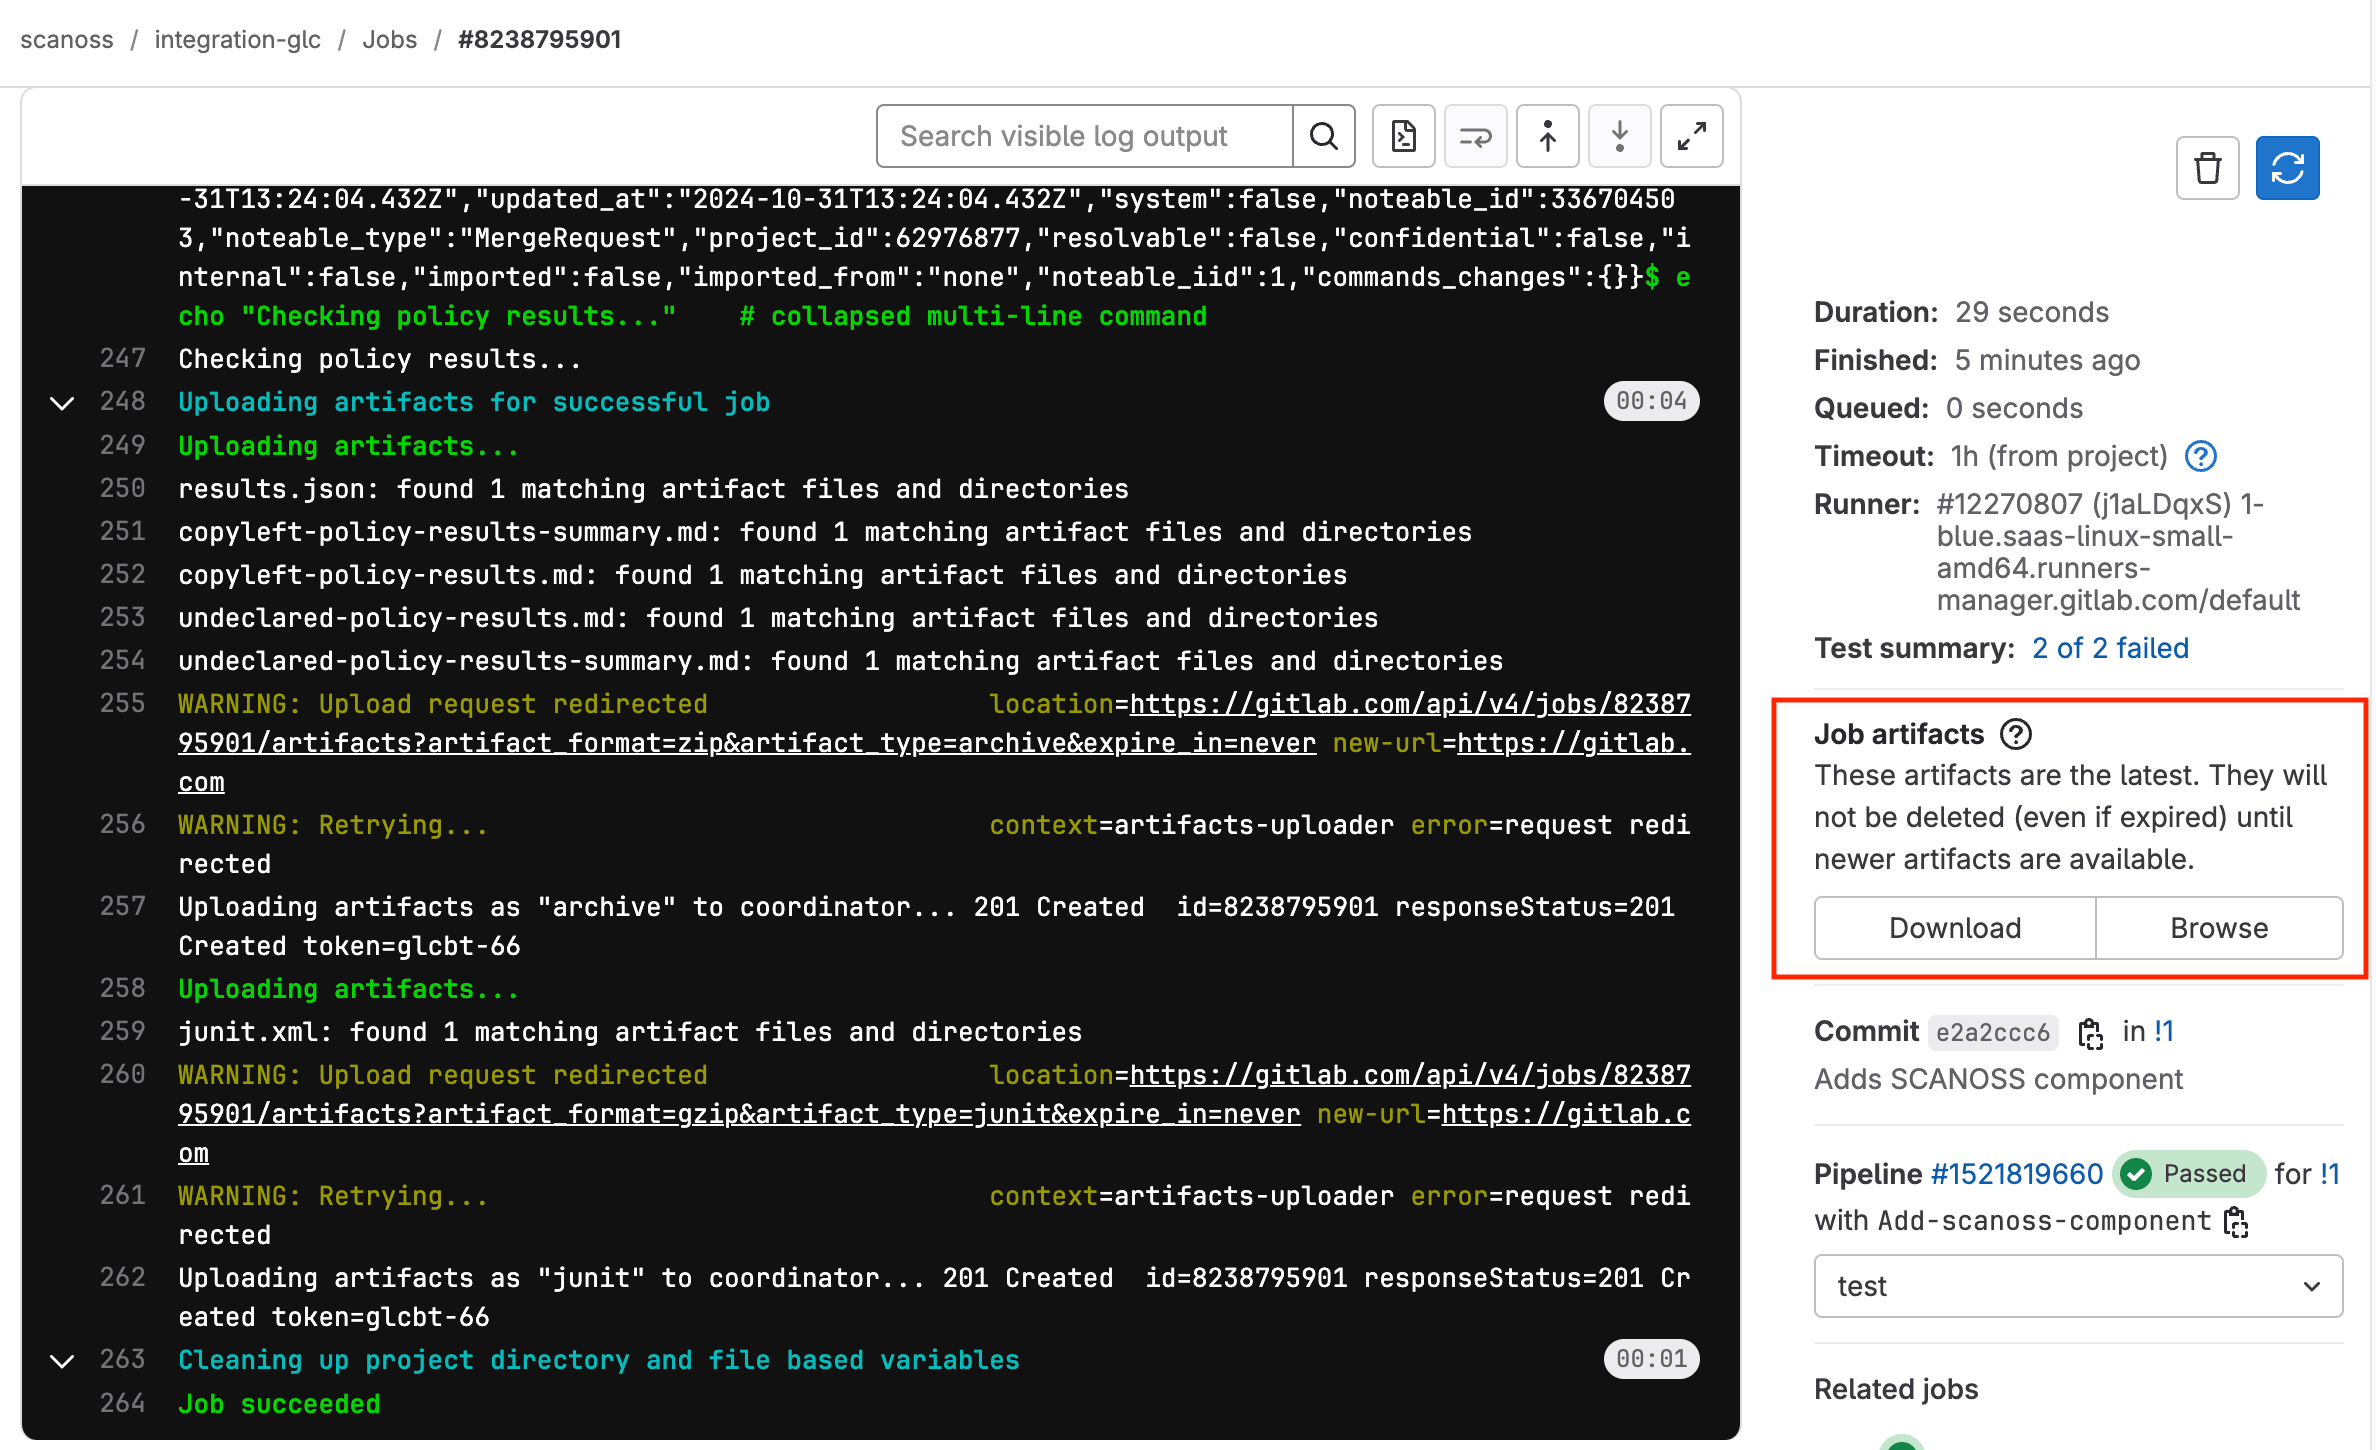
Scan results and policy check outcomes are uploaded to the artifacts of each pipeline run, regardless of how the pipeline was triggered. To access them, navigate to your pipeline run in GitLab CI/CD and open the Artifacts section.