

Before you begin
For GitHub:- Installing the app requires a GitHub organisation owner. If you’re not an owner, you can still start the connection and hand the final steps to someone who is. See If you are not an organisation owner.
- Managing the connection afterwards requires the Admin role in Earnie. Only Admins can connect, change, or disconnect an integration. See Team & roles.
- Creating the token requires access to a GitLab group, subgroup, or project. Use a group or project access token rather than a personal one, so the connection doesn’t depend on one person’s account. See Choosing a GitLab token.
- Managing the connection afterwards requires the Admin role in Earnie. See Team & roles.
What Earnie asks for
GitHub permissions
Earnie’s access to your source code is read-only and covers only the repositories you choose. Earnie also needs to write to pull requests and checks, so it can report its results where your team reviews code. Earnie lists each permission, and why it needs it, before you approve anything:Choosing a GitLab token
The token must meet three requirements:- The host it was created on runs GitLab 17.4 or later. The host can be gitlab.com, GitLab Dedicated, or self-managed.
- It has the
apiandread_repositoryscopes. - It is active and unexpired at the time you connect.
Fine-grained personal access tokens aren’t supported yet. They carry
per-resource permissions instead of scopes, so Earnie’s scope check refuses
them. Use a project, group, or classic personal access token instead.
Merge blocking depends on your GitLab plan
GitLab’s API shows a group’s plan only to a token with the Owner role. A token with less access, such as a Maintainer-level service account, can’t see it. If Earnie can see an Ultimate plan, the connection can enforce a merge block the same way a GitHub check does. Otherwise the connection is advisory. Earnie still comments and posts a status, but states that it can’t enforce a block. Settings and the scan page both show which mode a connection is in.How the connection is made
Connecting GitHub
The connection takes four steps. Some happen in Earnie and some in a GitHub window that Earnie opens for you.- Authorise Earnie to see your organisations. Earnie shows a short code. Enter it on GitHub, in the window that opens, so Earnie can list the GitHub organisations you belong to.
- Choose the organisation that will own the connection. This is usually the organisation that owns the repositories you want to scan.
- Earnie creates a GitHub App owned by that organisation. The app holds the permissions listed above.
- Install the app and choose which repositories it may read. You can grant access to all repositories in the organisation, or only to the ones you select.
If you are not an organisation owner
Only an owner of the GitHub organisation can install the app. If you choose an organisation where you’re a member but not an owner, Earnie creates a single-use hand-off link that you can send to an owner. The link shows the date it expires. The owner opens the link and completes the two remaining steps on GitHub, which are creating the app and installing it. They don’t need an Earnie account. Your setup continues on its own once they’re done.Connecting GitHub Enterprise Server
To connect your own GitHub Enterprise Server, choose GitHub Enterprise Server in the first step and enter its address, such ashttps://github.example.com.
- Requirements. Earnie needs GitHub Enterprise Server 3.4 or later, and shows an error when the server is older, unreachable, or not trusted. Your server must be able to reach Earnie to send it webhooks.
- Internal CA. If an internal CA signs the server’s certificate, paste that CA certificate too. Earnie trusts it for this server only.
- No authorisation code. Instead of entering a code, type the organisation that will own the app, or leave it empty for your personal account.
Connecting GitLab
- From onboarding or Settings → Integrations, choose GitLab.
- Enter the host. The default is
gitlab.com. For a self-managed instance, enter your host’s URL. - Paste the access token.
- If your host uses a certificate signed by an internal certificate authority, see Trusting a private CA below.
- Select Connect. Earnie verifies the host and the token before saving anything.
Someone else can connect it for you. From a hand-off link, a group
Owner can paste a token at a public
/connect/gitlab page without an Earnie
account or session. The link works once.Trusting a private CA
If a company’s own internal CA signs a self-managed GitLab host’s certificate, verification fails by default. Earnie’s environment doesn’t trust your company’s internal CA out of the box. See Deployment & data flow for where Earnie runs. To fix this, paste the CA certificate in PEM format into My GitLab uses an internal CA on the connect form. The form opens that field on its own if the host’s certificate fails to verify. The connection’s card shows the trusted certificate’s name and expiry, with a Replace CA certificate action for when the certificate is renewed.Importing projects
Once you’re connected, New scan → Repository, or the repository picker during onboarding, lists the projects the token’s account can reach. A group token lists the group and all its subgroups, a project token lists its one project, and a personal token lists your own memberships. Earnie groups projects by their nested namespace, such asacme/platform/infra.
- Archived projects are left out.
- The list stops at 5,000 projects, sorted by path, and says so. A search goes to GitLab, which matches a project’s name or path across the whole group, so a search finds projects beyond the cap.
- With more than one connection, a selector above the list, for example GitLab · acme, chooses which connection you’re picking from.
acme/api on gitlab.com and on your own host. Earnie imports each one through the connection you picked it from, and each becomes its own Earnie project.
Importing and connecting a project needs Maintainer access on GitLab,
because Earnie registers a project webhook at import time. Earnie refuses a
token below Maintainer with an error that names the problem, and creates nothing.
Disconnecting a project or a connection removes its hook.
What triggers a scan
With a project imported, Earnie scans in two cases:- Opening or updating a merge request starts a partial-coverage scan of the merge request’s head, the same as for a GitHub pull request.
- A push to the default branch starts a full rescan, the same as a push to GitHub’s default branch.
Feedback on a merge request
A scanned merge request gets the same three things a GitHub pull request does, under GitLab’s names for them:
If your connection is advisory rather than enforcing (see Merge blocking depends on your GitLab plan), a blocking gate adds a line to the note. The line says that Earnie recommends blocking but this connection can’t enforce it.
Managing the connection
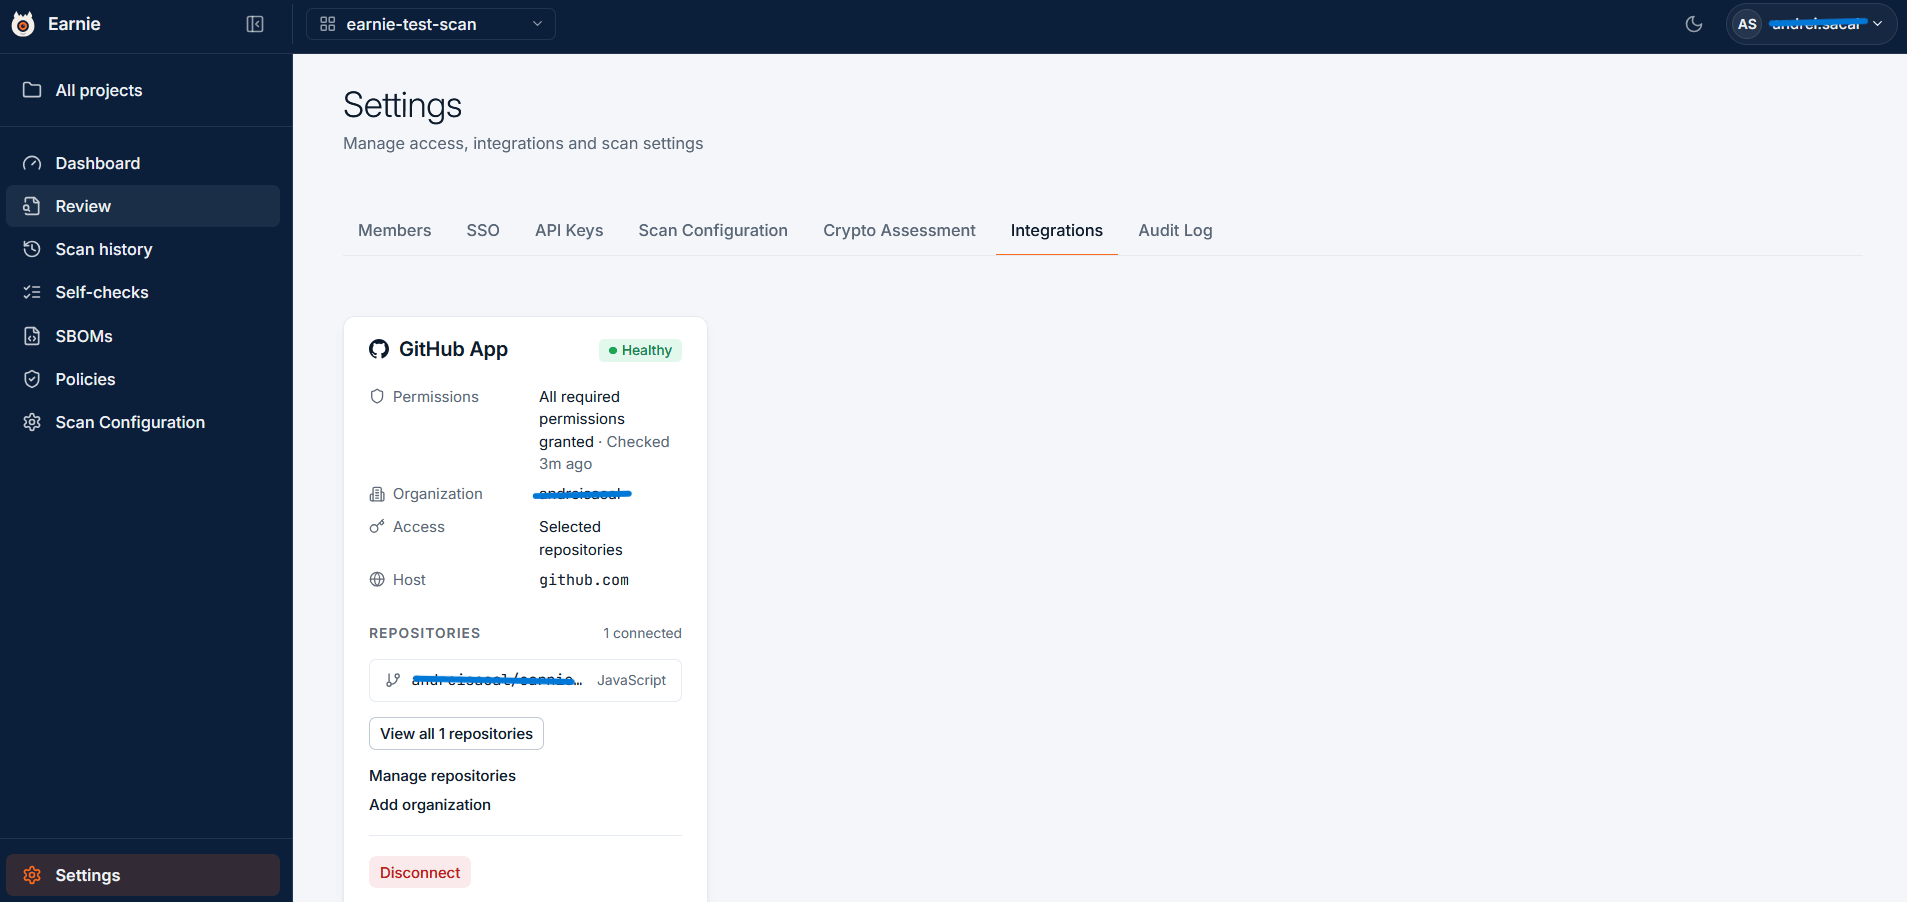
Managing GitHub
Disconnecting GitHub
Disconnecting removes the Earnie app from your GitHub organisation and deletes its stored credentials. Earnie loses access to your repositories, and future scans stop.Earnie keeps the findings and decisions you’ve already recorded.
Managing GitLab
The GitLab card sits beside GitHub’s. It shows health, scopes, the connected account, token kind, and an expiry countdown that changes its warning at 14 days and again at 3 days before expiry. From the card you can:
Below the connections, Repositories previews the GitLab projects your tokens reach, as on the GitHub card. View all lists every one with its language, visibility, and default branch, and lets you filter them. The list shows what Earnie can read, not what’s imported.
Disconnecting removes any hooks the connection registered on GitLab and deletes its stored credentials. Projects bound through it keep their findings and decisions but stop scanning. If you connect GitLab again, those projects get their connection back and Earnie registers their webhooks again.
Importing all repositories at once
To get a report on all your repositories on day one, import every repository of a connection in one go instead of one at a time. This needs the Admin role, the same as connecting a repository.- On Settings → Integrations, select Import all repositories on the GitHub or GitLab card.
- Pick the connection, if there are several.
- Optionally, narrow the repositories by path.
*stands for anything, soacme/platform/*takes one subgroup and*-servicetakes every service. Earnie leaves out forks unless you select Include forks. It always leaves out archived repositories, since they receive no changes. - Select Preview. Earnie lists the repositories it would import, how many are already imported, and how many the filter leaves out. Nothing is created yet.
- Select Import. Earnie creates one project per repository, connects it with its webhook, and scans it once.
- A repository that fails shows the reason, for example a GitLab token below Maintainer that can’t add the webhook. Fix the cause and select Retry failed. Earnie imports only the failed repositories again.
- Stop import skips the repositories not started yet. The projects already created stay.
- Importing again later adds only the repositories that are new since the last import.
Connection health
Earnie checks on a schedule that each connection still has the access it needs.GitHub connection health
Earnie also runs the check when you connect the app or update its permissions. The card for each connection on Settings → Integrations shows one of three states:
A temporary GitHub outage never changes the state. Only a permanent problem does.
Fixing a missing permission
When a permission is missing, the card lists it and offers Review on GitHub. Select it, then accept the new permission request on the app’s installation page. The state returns to Healthy on the next check.When the app is removed on GitHub
If someone uninstalls the app on GitHub, the card shows Disconnected. Earnie compares its connections with GitHub on a schedule, and the next time it does, it removes the connection entirely. You can then install the app again to restore access.The state also shows on projects. A project whose repository belongs to an affected
connection shows a GitHub connection degraded or GitHub connection
disconnected badge in its header, which links to Settings → Integrations.
Earnie records every change of state in the organisation audit
log as Integrations connection health
changed.
GitLab connection health
Earnie re-checks each connection’s token and webhook on a schedule:
GitLab disables a webhook temporarily after 4 consecutive failed deliveries, and re-enables it once deliveries succeed again. After 40 consecutive failures, GitLab disables it permanently. Earnie’s maintenance pass detects this and tries to re-enable the hook with a test delivery. If that fails, or the hook is gone, the connection degrades with the reason webhook disabled, shown on the GitLab card.