Before you begin
To complete the setup wizard you need two things.- A way to sign in. This is access through your organisation’s corporate SSO (single sign-on). If your administrator has enabled password sign-in, you can use your work email address instead, with a password you set from a link they send you.
- Ownership or Maintainer access on the organisation, group, or project that holds the repository you want to scan. Connecting a repository requires an organisation owner. If you’re not one, Earnie gives you a link to send to one.
Signing in
The login page shows the sign-in methods your workspace uses. Each workspace runs one of three sign-in modes:
Password sign-in is off unless your administrator has enabled it for your workspace. If you don’t see an email and password form, your workspace signs in through SSO.

Email and password
You can use this method only if your administrator has enabled password sign-in. Enter your work email address and password, then select Sign in.Choosing your password
When an administrator adds you to a workspace that signs in with a password, they send you a link that opens Set your password. The link works once and expires after 72 hours. If it says it has expired or was already used, ask your administrator for a new one. The old link stops working as soon as the administrator creates a new one. If you forget your password later, ask an Admin for a reset link.Changing your password
If you sign in with a password, open the User menu at the top right and select Change password. Enter your current password, then your new one twice, and select Change password. You stay signed in on the device you used. Earnie signs you out of every other device, so sign in again there with the new password.Corporate SSO
Select Sign in with corporate SSO. Earnie redirects you to your organisation’s identity provider, the service your company uses to manage logins. After you authenticate there, the identity provider sends you back to Earnie and you’re signed in to your workspace. Both methods sign you in to the same workspace, with the same members, roles, permissions, and audit history.After you sign in
Where you land depends on how you arrived:- On your first sign-in as an Admin, Earnie takes you straight into the setup wizard.
- If you open a link to a specific Earnie page while signed out, for example from a pull request comment, Earnie takes you to that page after you sign in, whichever sign-in method you use.
- When you return, Earnie opens the last project you were viewing, or All Projects if that’s where you were. If your organisation has only one project, you go straight into it.
The setup wizard

1. Welcome
The first screen explains what the wizard builds: one governed inventory of all your code. The inventory covers the open-source components in your code, snippets copied from elsewhere, their licences, known vulnerabilities, and provenance, meaning where the code came from. Select GitHub or GitLab to begin.2. Connect a provider
- GitHub
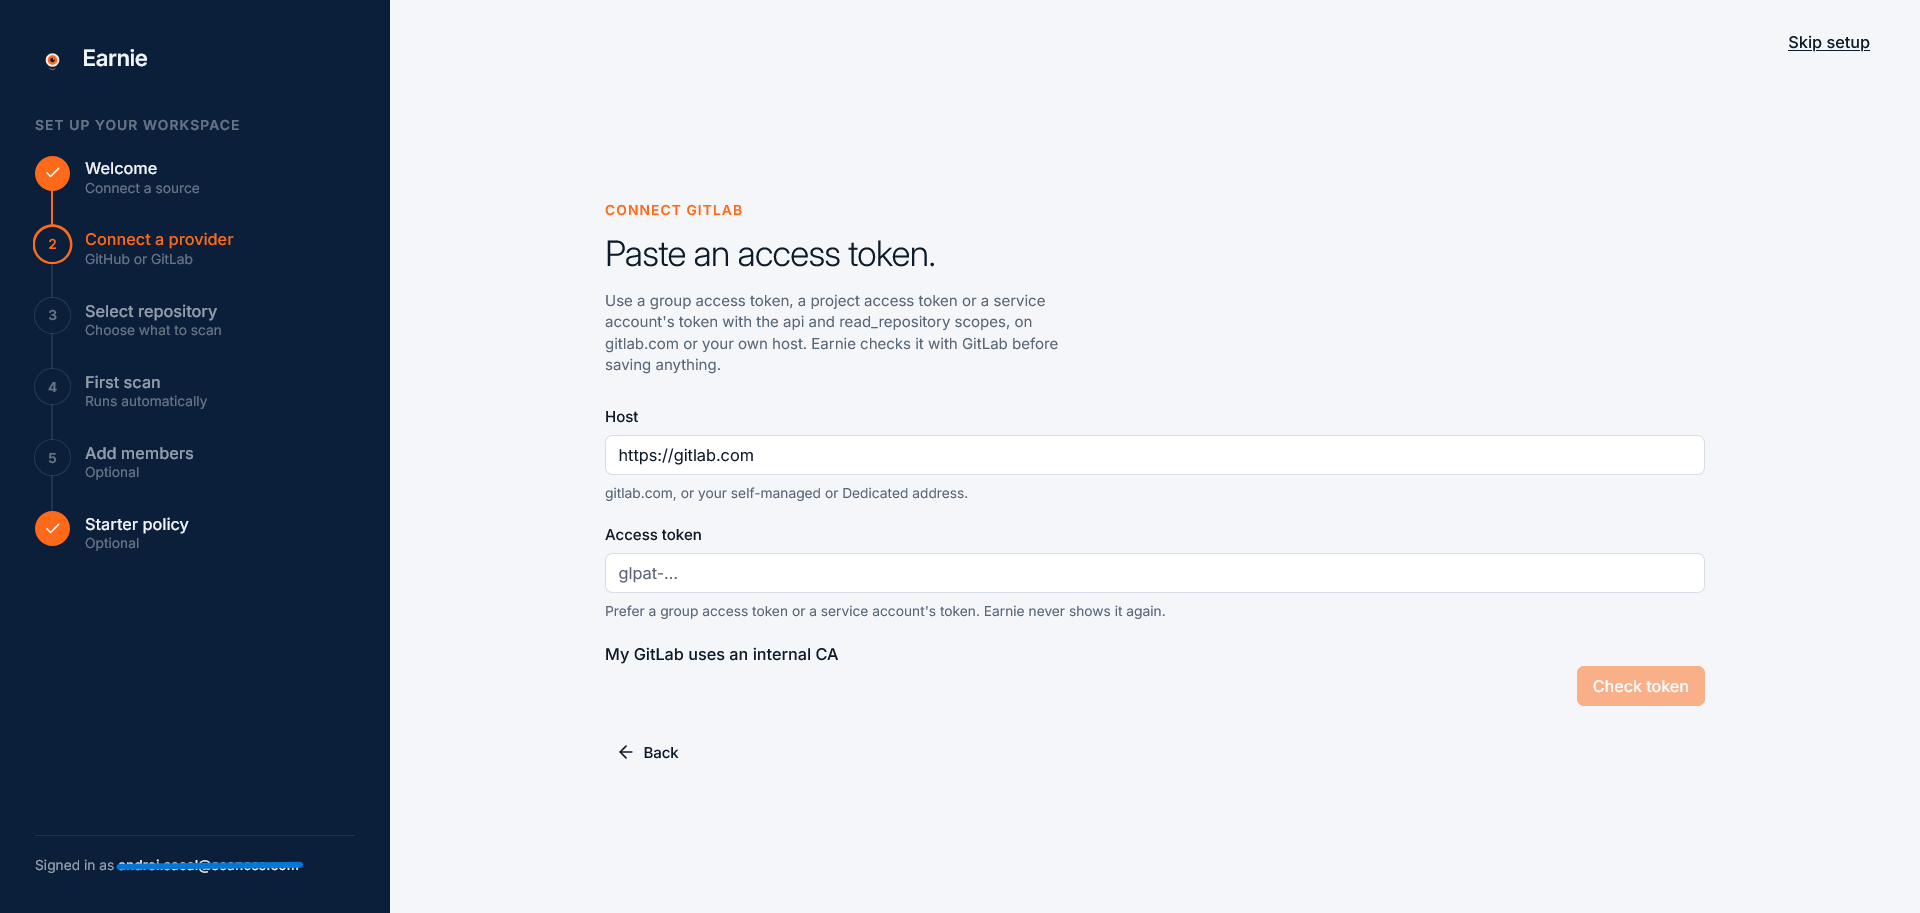
- GitLab

- Authorise Earnie once, so it can see which GitHub organisations you belong to.
- Choose the organisation that will own the connection.
- Install the app.
3. Select repository
In this step you create your first project, the codebase Earnie governs together with its scans, decisions, and rules.- Pick the repository this project will govern.
- Name the project. Earnie fills this field with the repository’s name when you pick the repository. You can also add a description.
- Choose the scanners and intelligence layers for the first scan:
- Scanners analyse the source code itself. Open-source matching always runs. If your workspace has Cryptography or AI enabled, Earnie selects each of them by default. See AI provenance for what the AI scanner identifies.
- Download Git LFS models appears once AI provenance is on. It controls whether Earnie fetches model weights stored in Git LFS so it can identify them. Use the project preference, or download or skip for this scan only. Downloads use the repository owner’s Git LFS bandwidth quota.
- Intelligence layers add data to what the scanners find, such as known vulnerabilities and licence data.
4. First scan

5. Add members (optional)

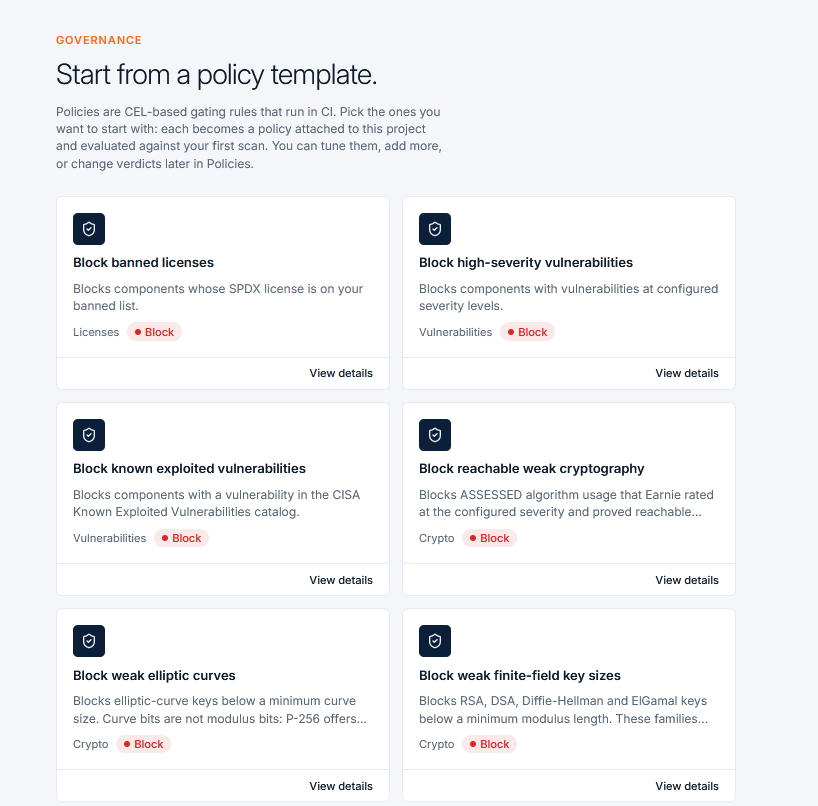
6. Starter policy (optional)