

- The project needs at least one completed scan, so the policy has findings to evaluate. See Your first scan.
- You need the Operator or Admin role to create and edit policies. See Team & roles.
What a policy does
Three possible actions
Every policy has one action. The action decides what happens when a finding matches the rule:Start with Warn. A new rule set to Warn shows you how many findings it
affects without stopping anyone’s merge. Change it to Block once you’ve dealt
with the backlog of findings it reports.
Writing a policy
You can start from Earnie’s built-in templates, or write your own rule from scratch.Starting from templates
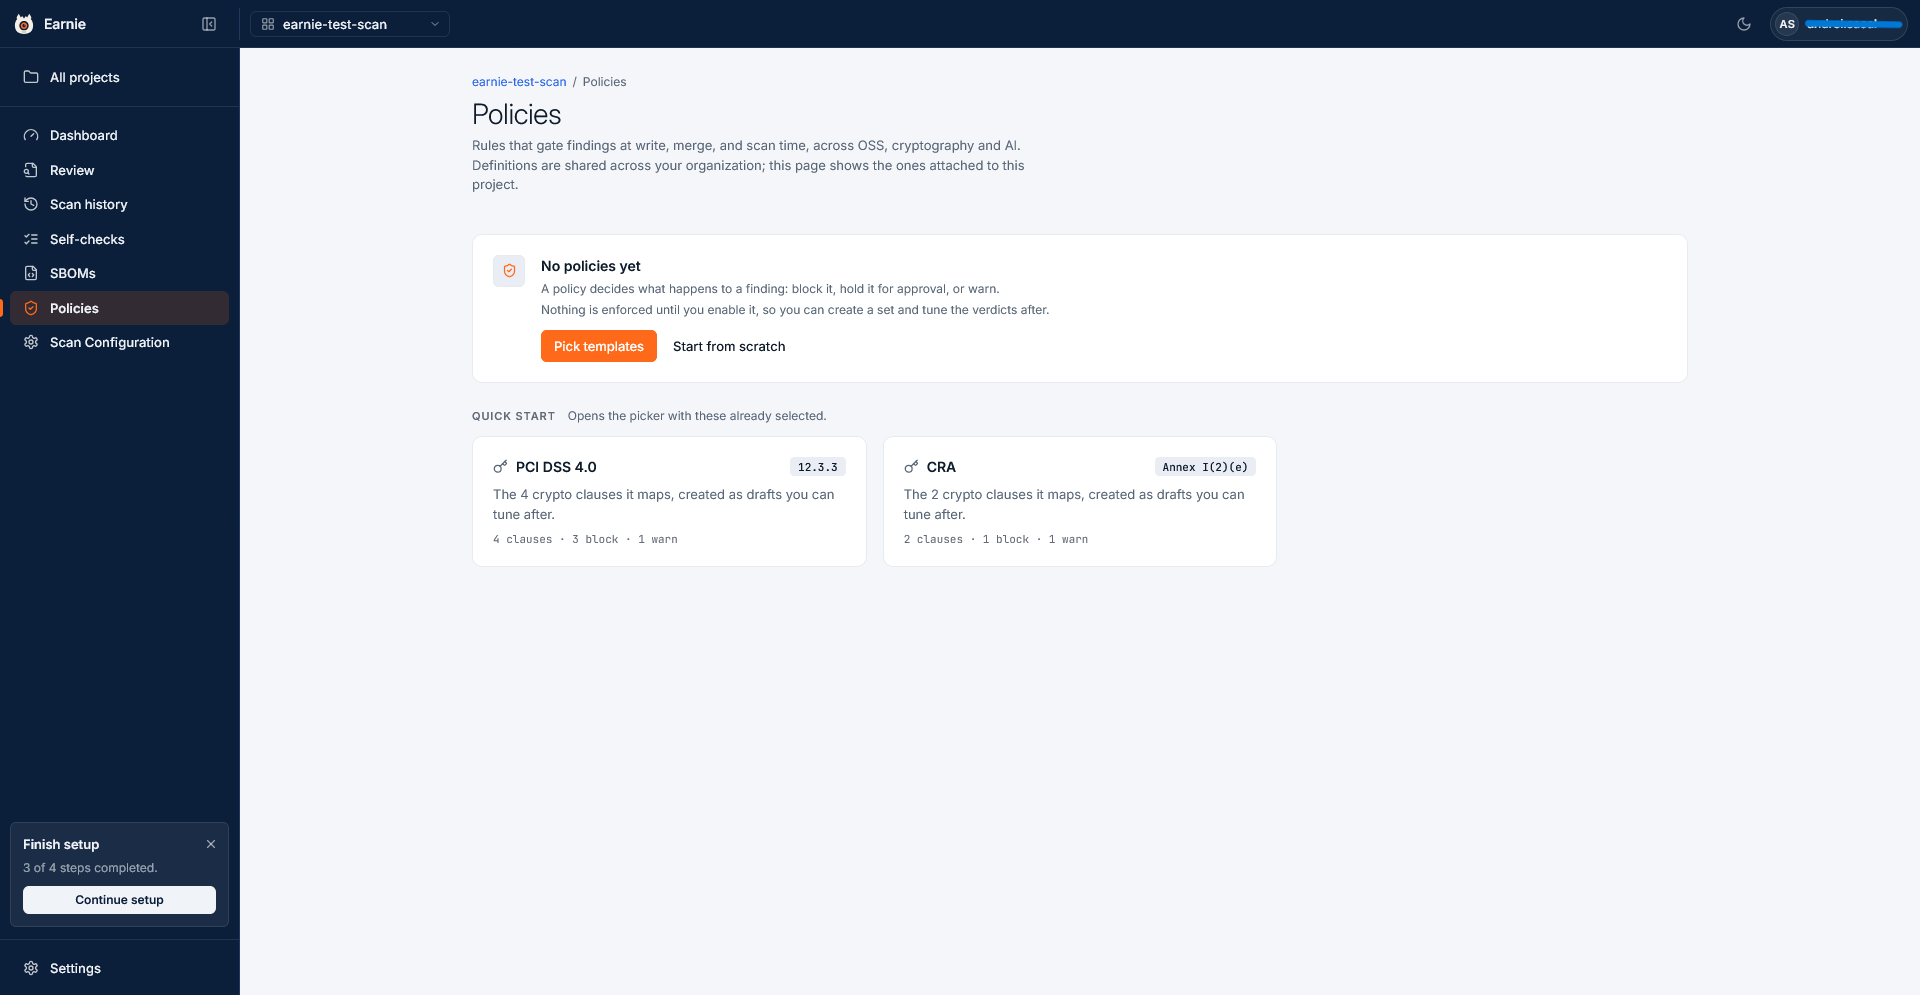
Templates are ready-made policies for the rules most teams set up first.- On the project’s Policies page, select New policy. If the project has no policies yet, select Pick templates instead.
- The picker lists every built-in template in a sortable table, with its category and action. Select Details on a template to read more about it.
- Tick the templates you want, then select Use n templates (for example Use 3 templates) to create them all at once.
Starting from scratch
Select Start from scratch to write a rule yourself. You then give the policy a name and choose what it evaluates. See What a policy evaluates.Building the rule
Under The rule, you can write the condition in two ways. Earnie keeps them in sync, so a change in one shows up in the other.- In Sentence, you build the condition by picking fields, operators, and values, with no syntax to learn. If you wrote a condition in CEL with an operator or value the builder doesn’t offer for that field, the builder still shows it as written, listed beside the options it offers.
- In CEL, you write the condition as an expression in CEL (Common Expression Language), with autocomplete and live validation. Use it for conditions the Sentence builder can’t express.
Parameter checks on save
When you save, Earnie checks every parameter value against the parameter it belongs to:- a number parameter must hold a number, and a whole-number parameter must hold a whole number
- a choice must be one of its listed options
- a list must hold only text
- Earnie refuses a value for a parameter the policy doesn’t declare
What a policy evaluates
Every policy evaluates one kind of finding. When you create a policy, you choose this under Evaluates, next to Category:- OSS findings are findings from open-source scanning.
- Crypto findings are findings from cryptography scanning. Earnie offers this option only if your organisation has Cryptography enabled.
- AI findings are findings from AI provenance scanning, covering both identified models and AI usage. Earnie offers this option only if your workspace has AI governance enabled. See AI provenance for the field group and the seven starter templates.
Some fields must be checked before they’re read. Not every finding has
every field. For example, a key size exists only where Earnie resolved an
actual key length. A rule that asks whether a key is under 2048 bits has to
limit itself to findings where the key length is known.The Sentence builder writes that check for you. In CEL, you write it with
has(). The editor refuses to save a rule that reads such a field without
the check, and names the field and the check to add, for example:
field "finding.crypto.key_size" is optional — guard with has(finding.crypto.key_size).Rules about cryptography
With Cryptography enabled, the rule builder gains a Crypto field group, and seven cryptography templates become available:
EAR, the US Export Administration Regulations, is the set of export-control rules these export fields and templates refer to.
Crypto fields for export control
The Crypto group includes the finding’s purpose and three export-control signals. These fields are evidence only. Each export signal has one of four values:met, not_met, unknown, or not_evaluated.
When a Sentence rule uses one of these fields, the builder shows a fixed
disclaimer: “Export-control evidence supports your self-classification.
It is not legal advice and does not determine or imply an ECCN.”The values mean different things, so write rules with care:
- An absent field means the producer supplied no value. Use
has()when a field may be absent. unknownmeans the producer supplied an applicable test but couldn’t resolve it.not_evaluatedmeans the test had no applicable occurrence evidence.
Fields that read more precisely than they look
-
Route Evidence (
finding.crypto.route_evidence) is the weakest call on the strongest path to the finding. The value isdirectwhen Earnie resolved every call statically,dispatchwhen the path needs an interface or runtime dispatch call (the finding stays reachable), andname_onlywhen every path needs a call matched by method name alone, so reachability is unknown. -
No Known Callers (
finding.crypto.no_callers_only) istruewhen every path starts in application code that nothing in the application calls, instead of at amainor a recognised framework entry point. To match “reachable from a known caller”, writehas(finding.crypto.no_callers_only) && !finding.crypto.no_callers_only. -
Dependency Relationship (
finding.crypto.dependency_relationship) isdirectwhen your project declares the library a dependency finding sits in, andtransitivewhen the library arrives through another dependency. To match “cryptography in a transitive dependency”, writehas(finding.crypto.dependency_relationship) && finding.crypto.dependency_relationship == "transitive". These three fields are absent when the scan traced no path to the finding, and on scans from crypto-finder releases that don’t report them. Dependency Relationship is also absent on findings in your own code. Guard all three withhas(). -
Reachability has three values, not two. A rule writes them as
reachable,unreachable, andunknown, and the finding shows them as Reachable, Not reached, and Unknown. A rule that should fire only on proven usage must sayreachable. A rule that asks for “not unreachable” also matches every finding the analysis couldn’t decide. - Key Size (bits) exists only where Earnie resolved an actual key length. Where it couldn’t, the field is absent, and a key-size rule skips the finding instead of guessing.
-
Elliptic Curve (
crypto.elliptic_curve) names the curve an algorithm or a piece of key material uses, for examplesecg/secp256k1, when Earnie resolved one. It’s free text, not a fixed list, because CycloneDX’s own curve vocabulary has hundreds of entries. - Risk Assessed records whether Earnie’s curated tables decided this finding’s severity. When it’s false, the severity is a placeholder, not a judgement, and reachability doesn’t raise it. This is why an unassessed finding never escalates to a blocking severity.
Use Post-Quantum Status, not Quantum Safe. The older Quantum Safe
yes/no field still works but is deprecated, because a yes/no value can’t
separate “we checked, it’s fine” from “we haven’t looked”. On an unassessed
asset the yes/no field is absent, not false. A rule on it must therefore say
“Quantum Safe is set and is false”. A rule that only says “Quantum Safe is
false” errors on the findings it can’t answer for. Write new rules against the
four-value field instead.
Without Cryptography enabled, Earnie hides the Crypto field group, the
cryptography templates, and the regulatory template sets.
Regulatory template sets
Some regulations and standards require specific cryptography controls. A regulatory template set selects every template mapped to one clause of a standard in a single action, so you don’t have to find them one by one. The sets appear as Quick start cards on a project with no policies yet, and under Start from a framework in the template picker. Each card shows the clause it maps to.Neither template set blocks reachable TLS 1.3. Earnie doesn’t verify FIPS
140-3 module validation.
Where a policy applies
A policy belongs to your organisation, not to a single project, so you can attach the same rule to several projects. Open a policy to see its Where this applies panel. It names every project the policy is attached to and the repository connected to each one, so you can see which repositories the policy covers.A policy governs a project’s applicable findings whether or not the project
has a repository connected. Earnie covers an upload-only project the same way
as one backed by a repository. The panel shows the two facts separately: what
the policy governs, and whether the project has a repository connected.
Editing a shared policy
Because the rule is shared, editing it changes the gate for every project it’s attached to.- If the policy is attached to more than one project, Earnie asks you to confirm before saving and lists the projects the change affects.
- If the policy is attached to one project, it saves without the confirmation.
Cloning a policy
Cloning starts a new rule from an existing one, so you don’t begin from a blank template.- Open the policy you want to copy.
- Open the More actions menu and choose Clone policy.
- Confirm in the dialog.
- has the original’s name with “(copy)” added to the end
- has its own identifier
- is attached to the project you cloned it from, so you can find and adjust it straight away
- is enabled or a draft, matching the original
A copy of a built-in template becomes a regular custom policy that you can
edit.